Standard Premium ULTIMATE
Introduction
There are several ways to connect a project to a Git repository using the Flow Editor. After reading this guide, you will be able to create a project using the Flow Editor, create a repository and open an existing project. You will also know how the version control of the Flow Editor works and how to use it.
When you open the Flow Editor you’ll be greeted by a welcome screen that invites you to:
-
Create Project
-
Clone Repository
-
Open existing project
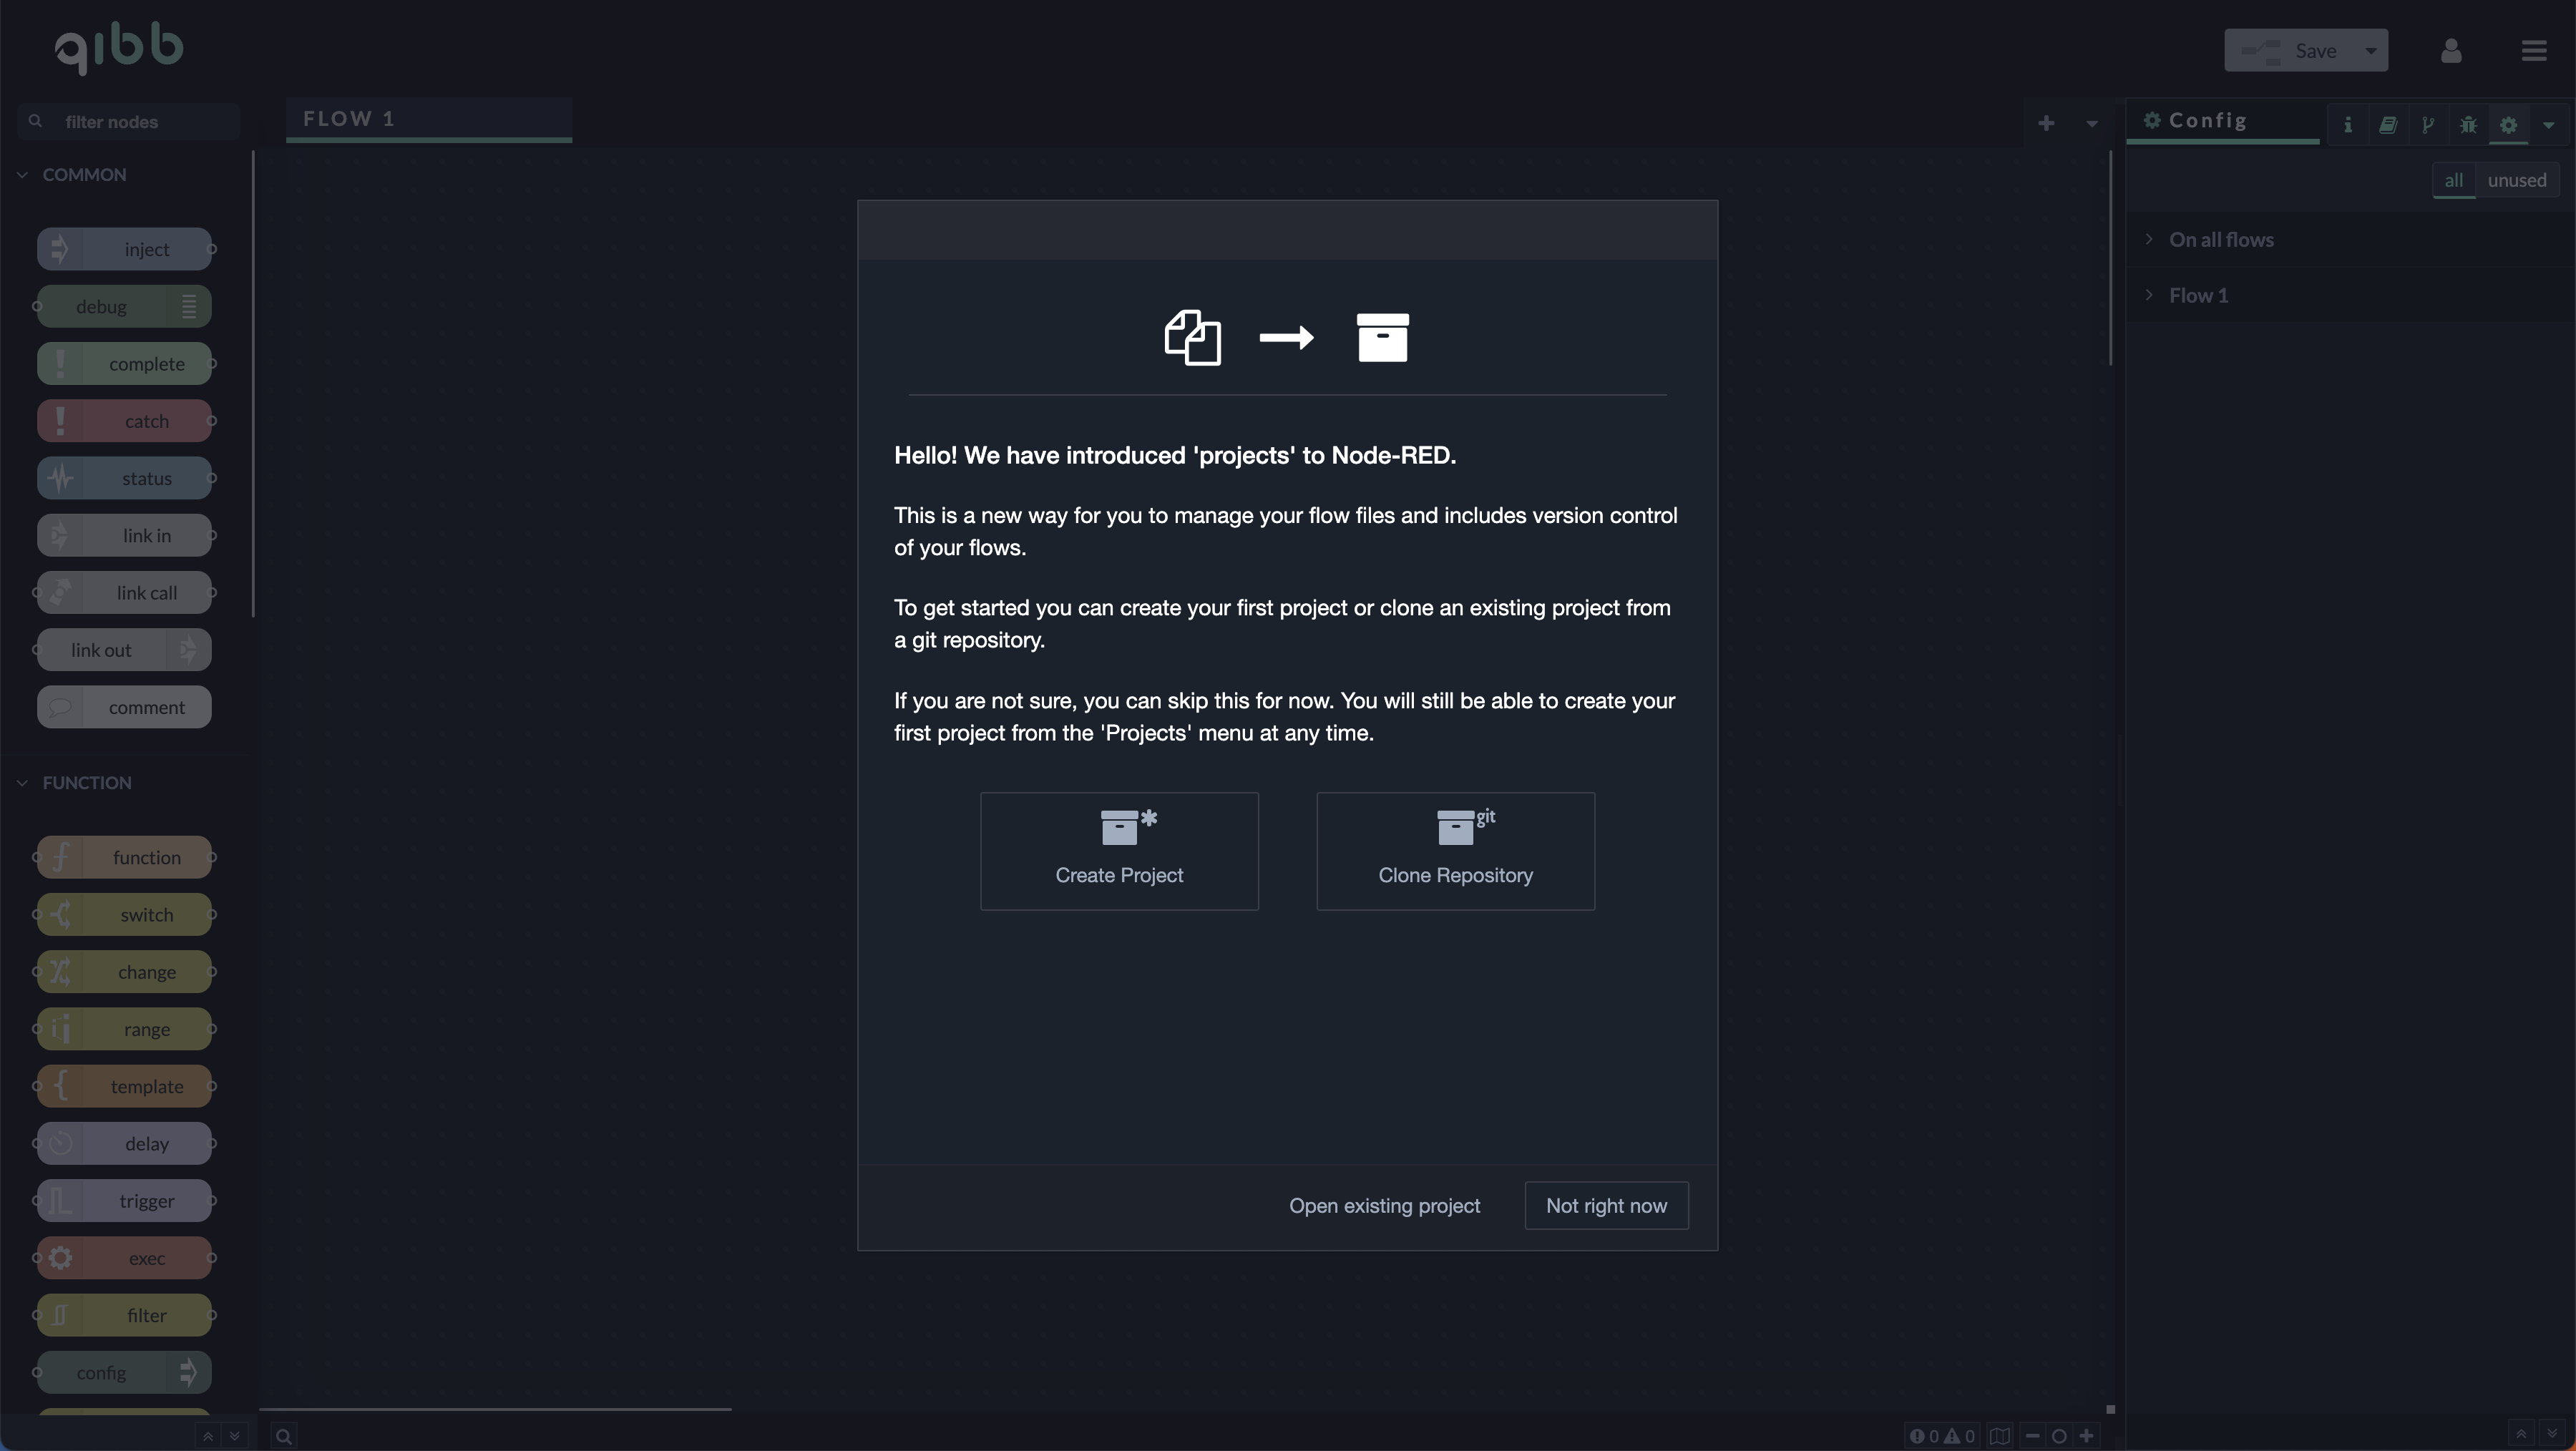
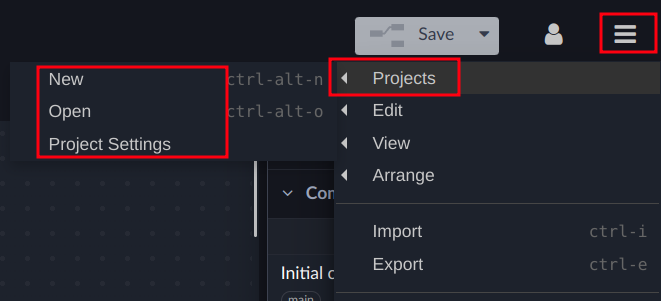
You can also reach this screen by selecting Projects → New from the burger menu in the upper right corner of the Flow Editor.
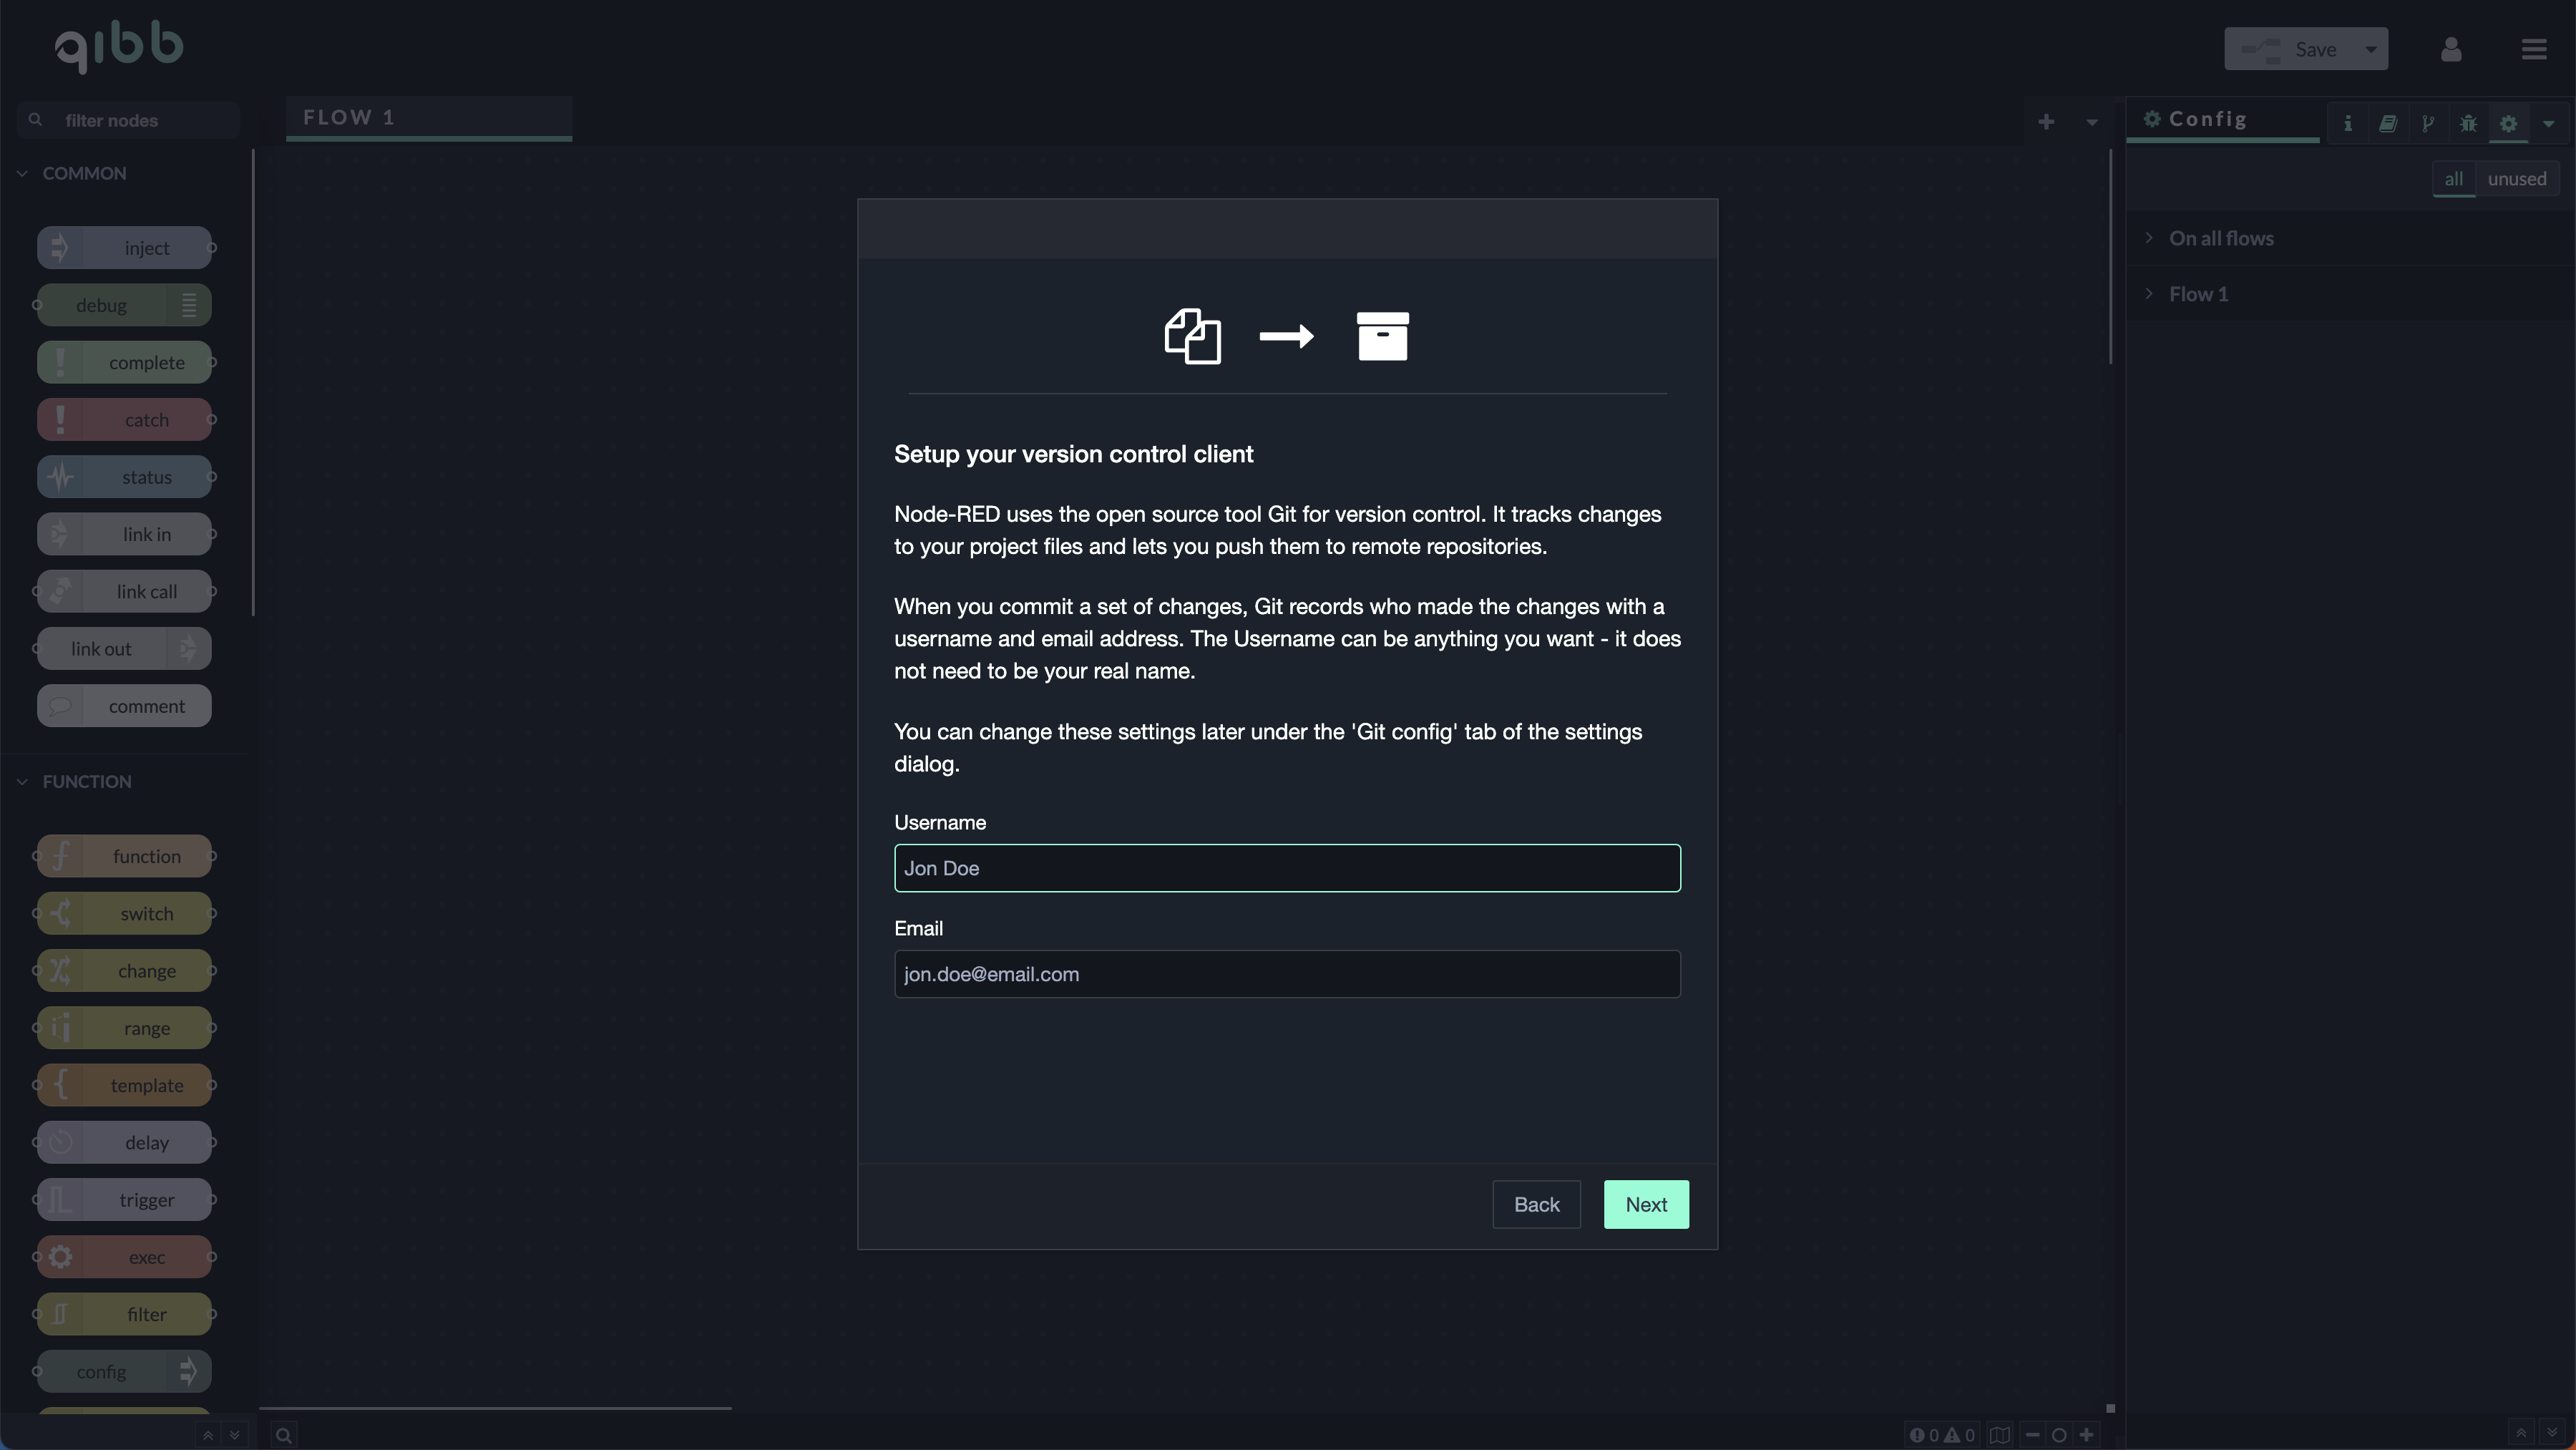
Setup your version control client
In all cases - Create Project, Clone Repository and Open existing project - you have to set up your Version Control client first.
The Flow Editor uses the open source tool Git for version control. It tracks changes to your project files and lets you push them to remote repositories.
When you commit a set of changes, Git records who made the changes with a username and email address. The Username can be anything you want - it does not need to be your real name.
You can change these settings later under the 'Git config' tab of the settings dialog.
Create Project
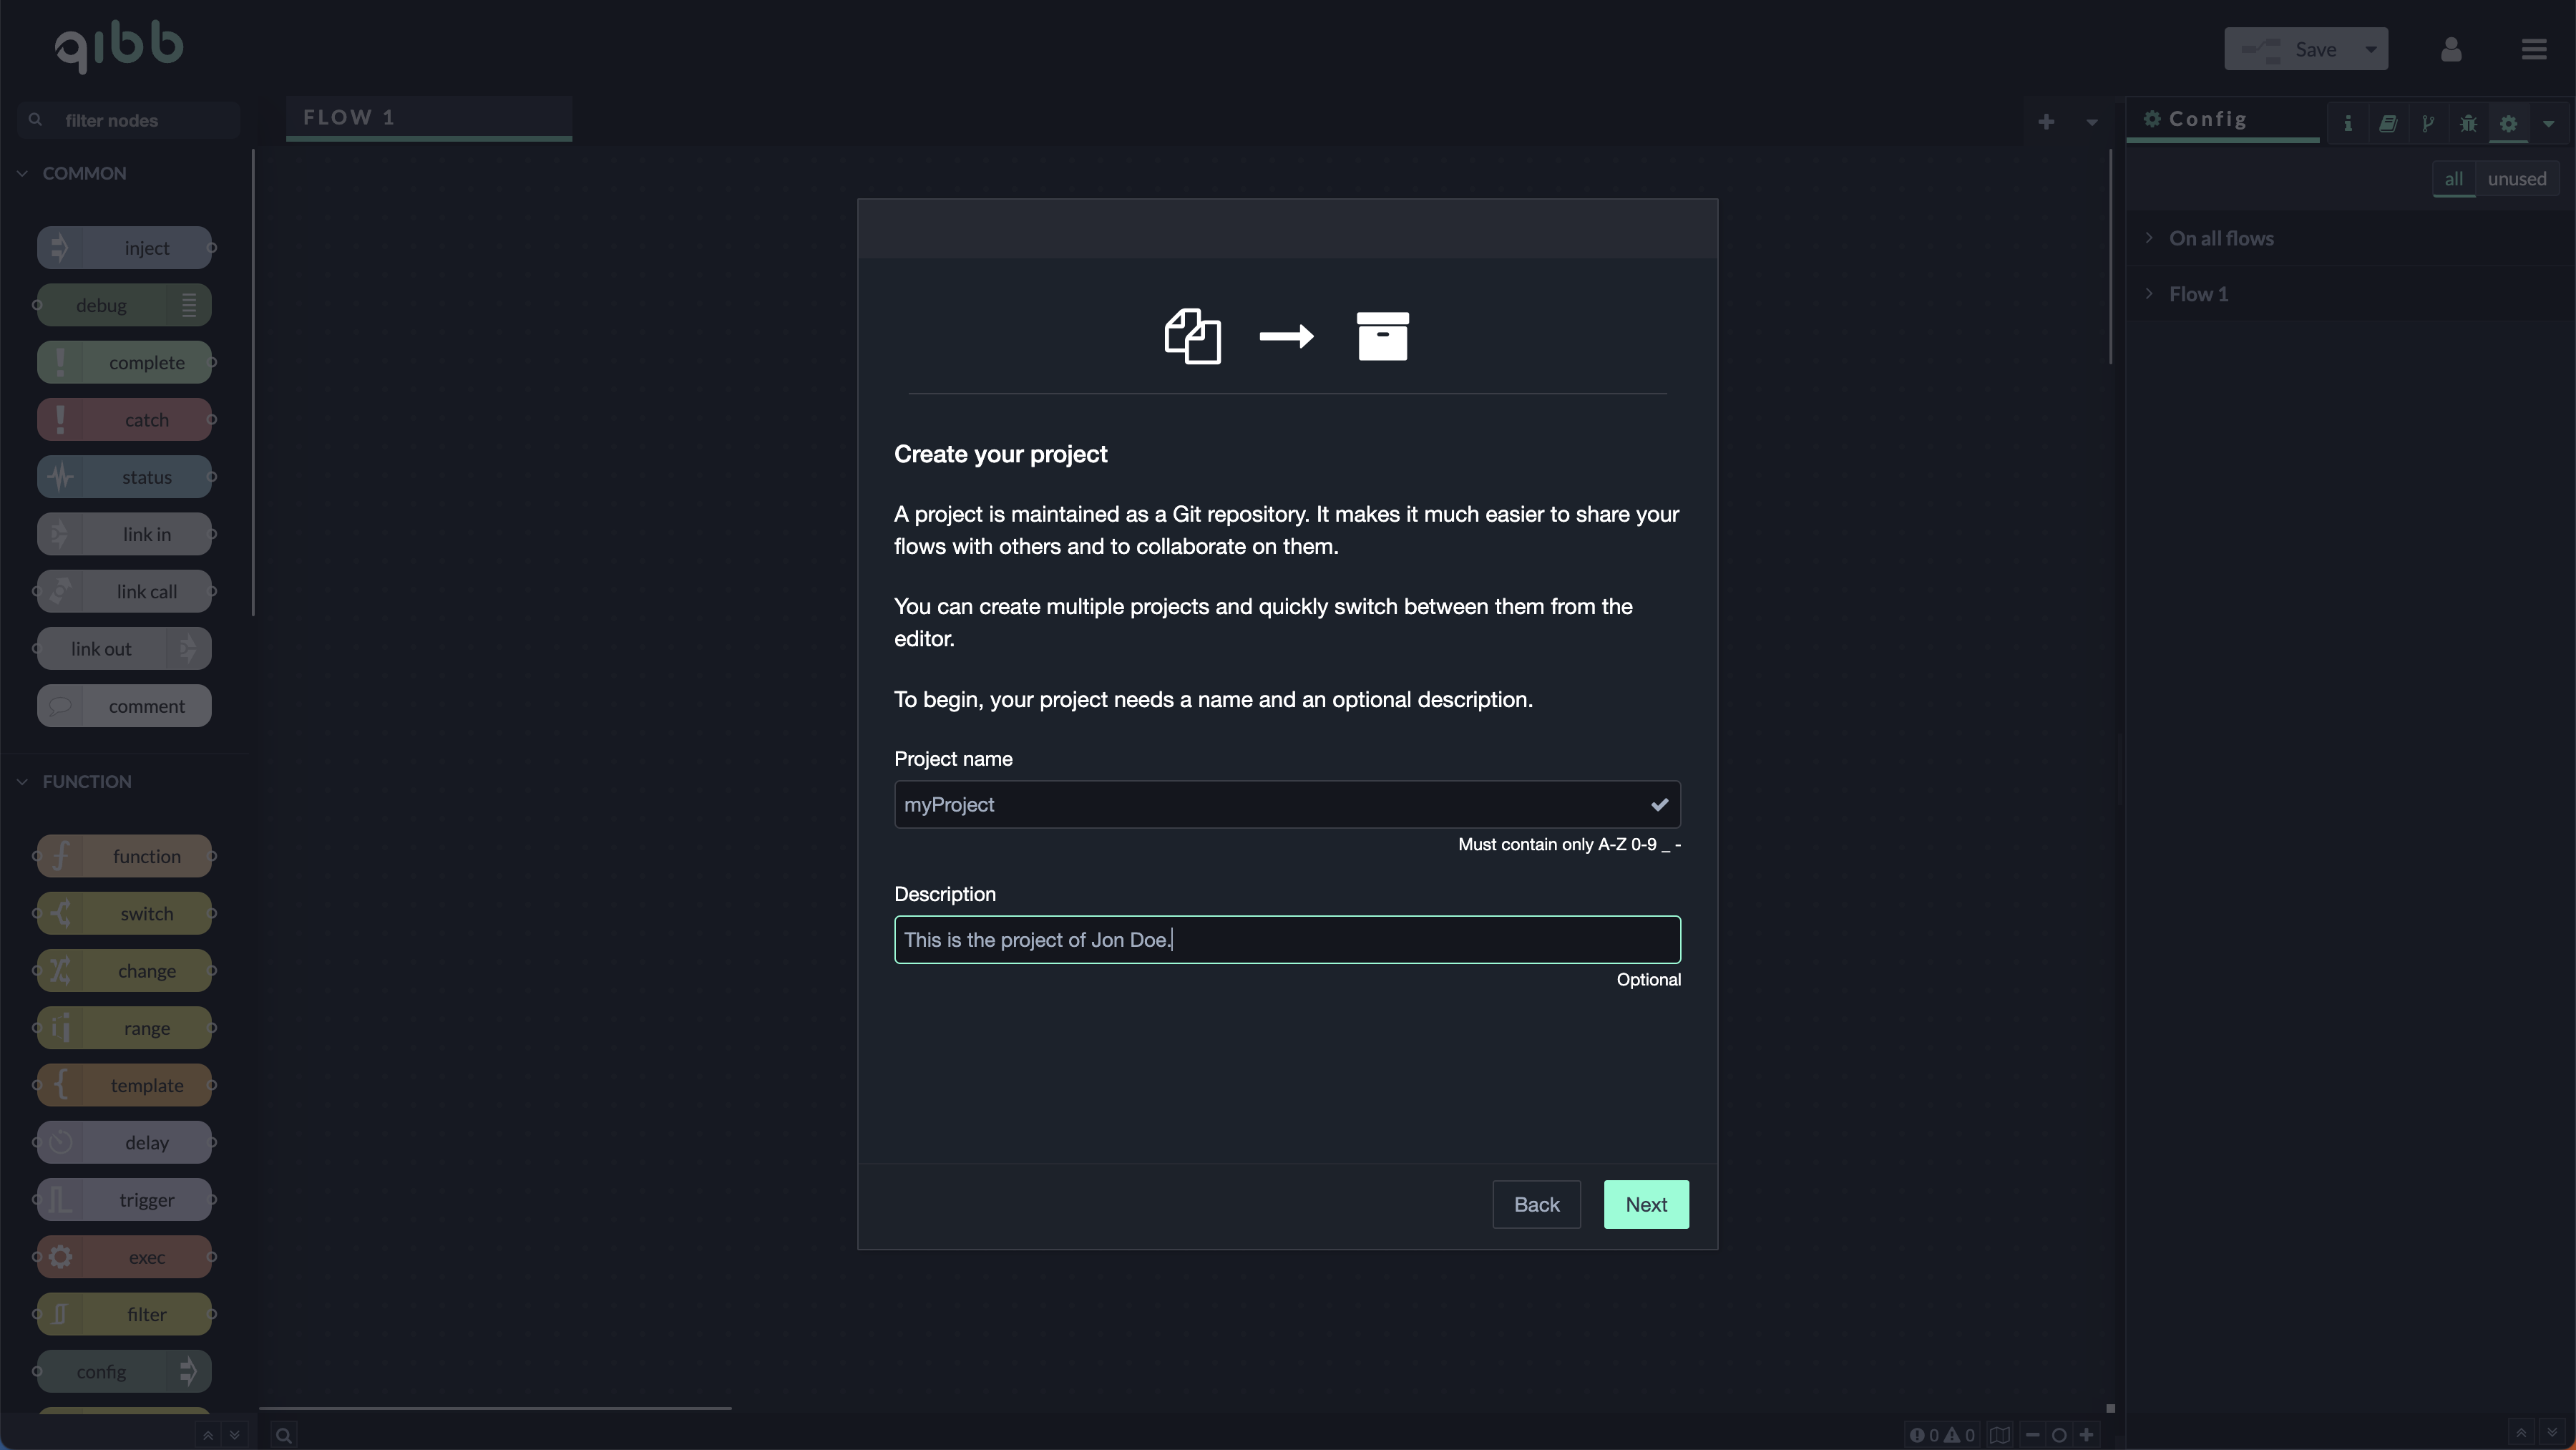
1. Create your project
A project is maintained as a Git repository. It makes it much easier to share your flows with others and to collaborate on them.
You can create multiple projects and quickly switch between them from the editor.
To begin, your project needs a name and an optional description.
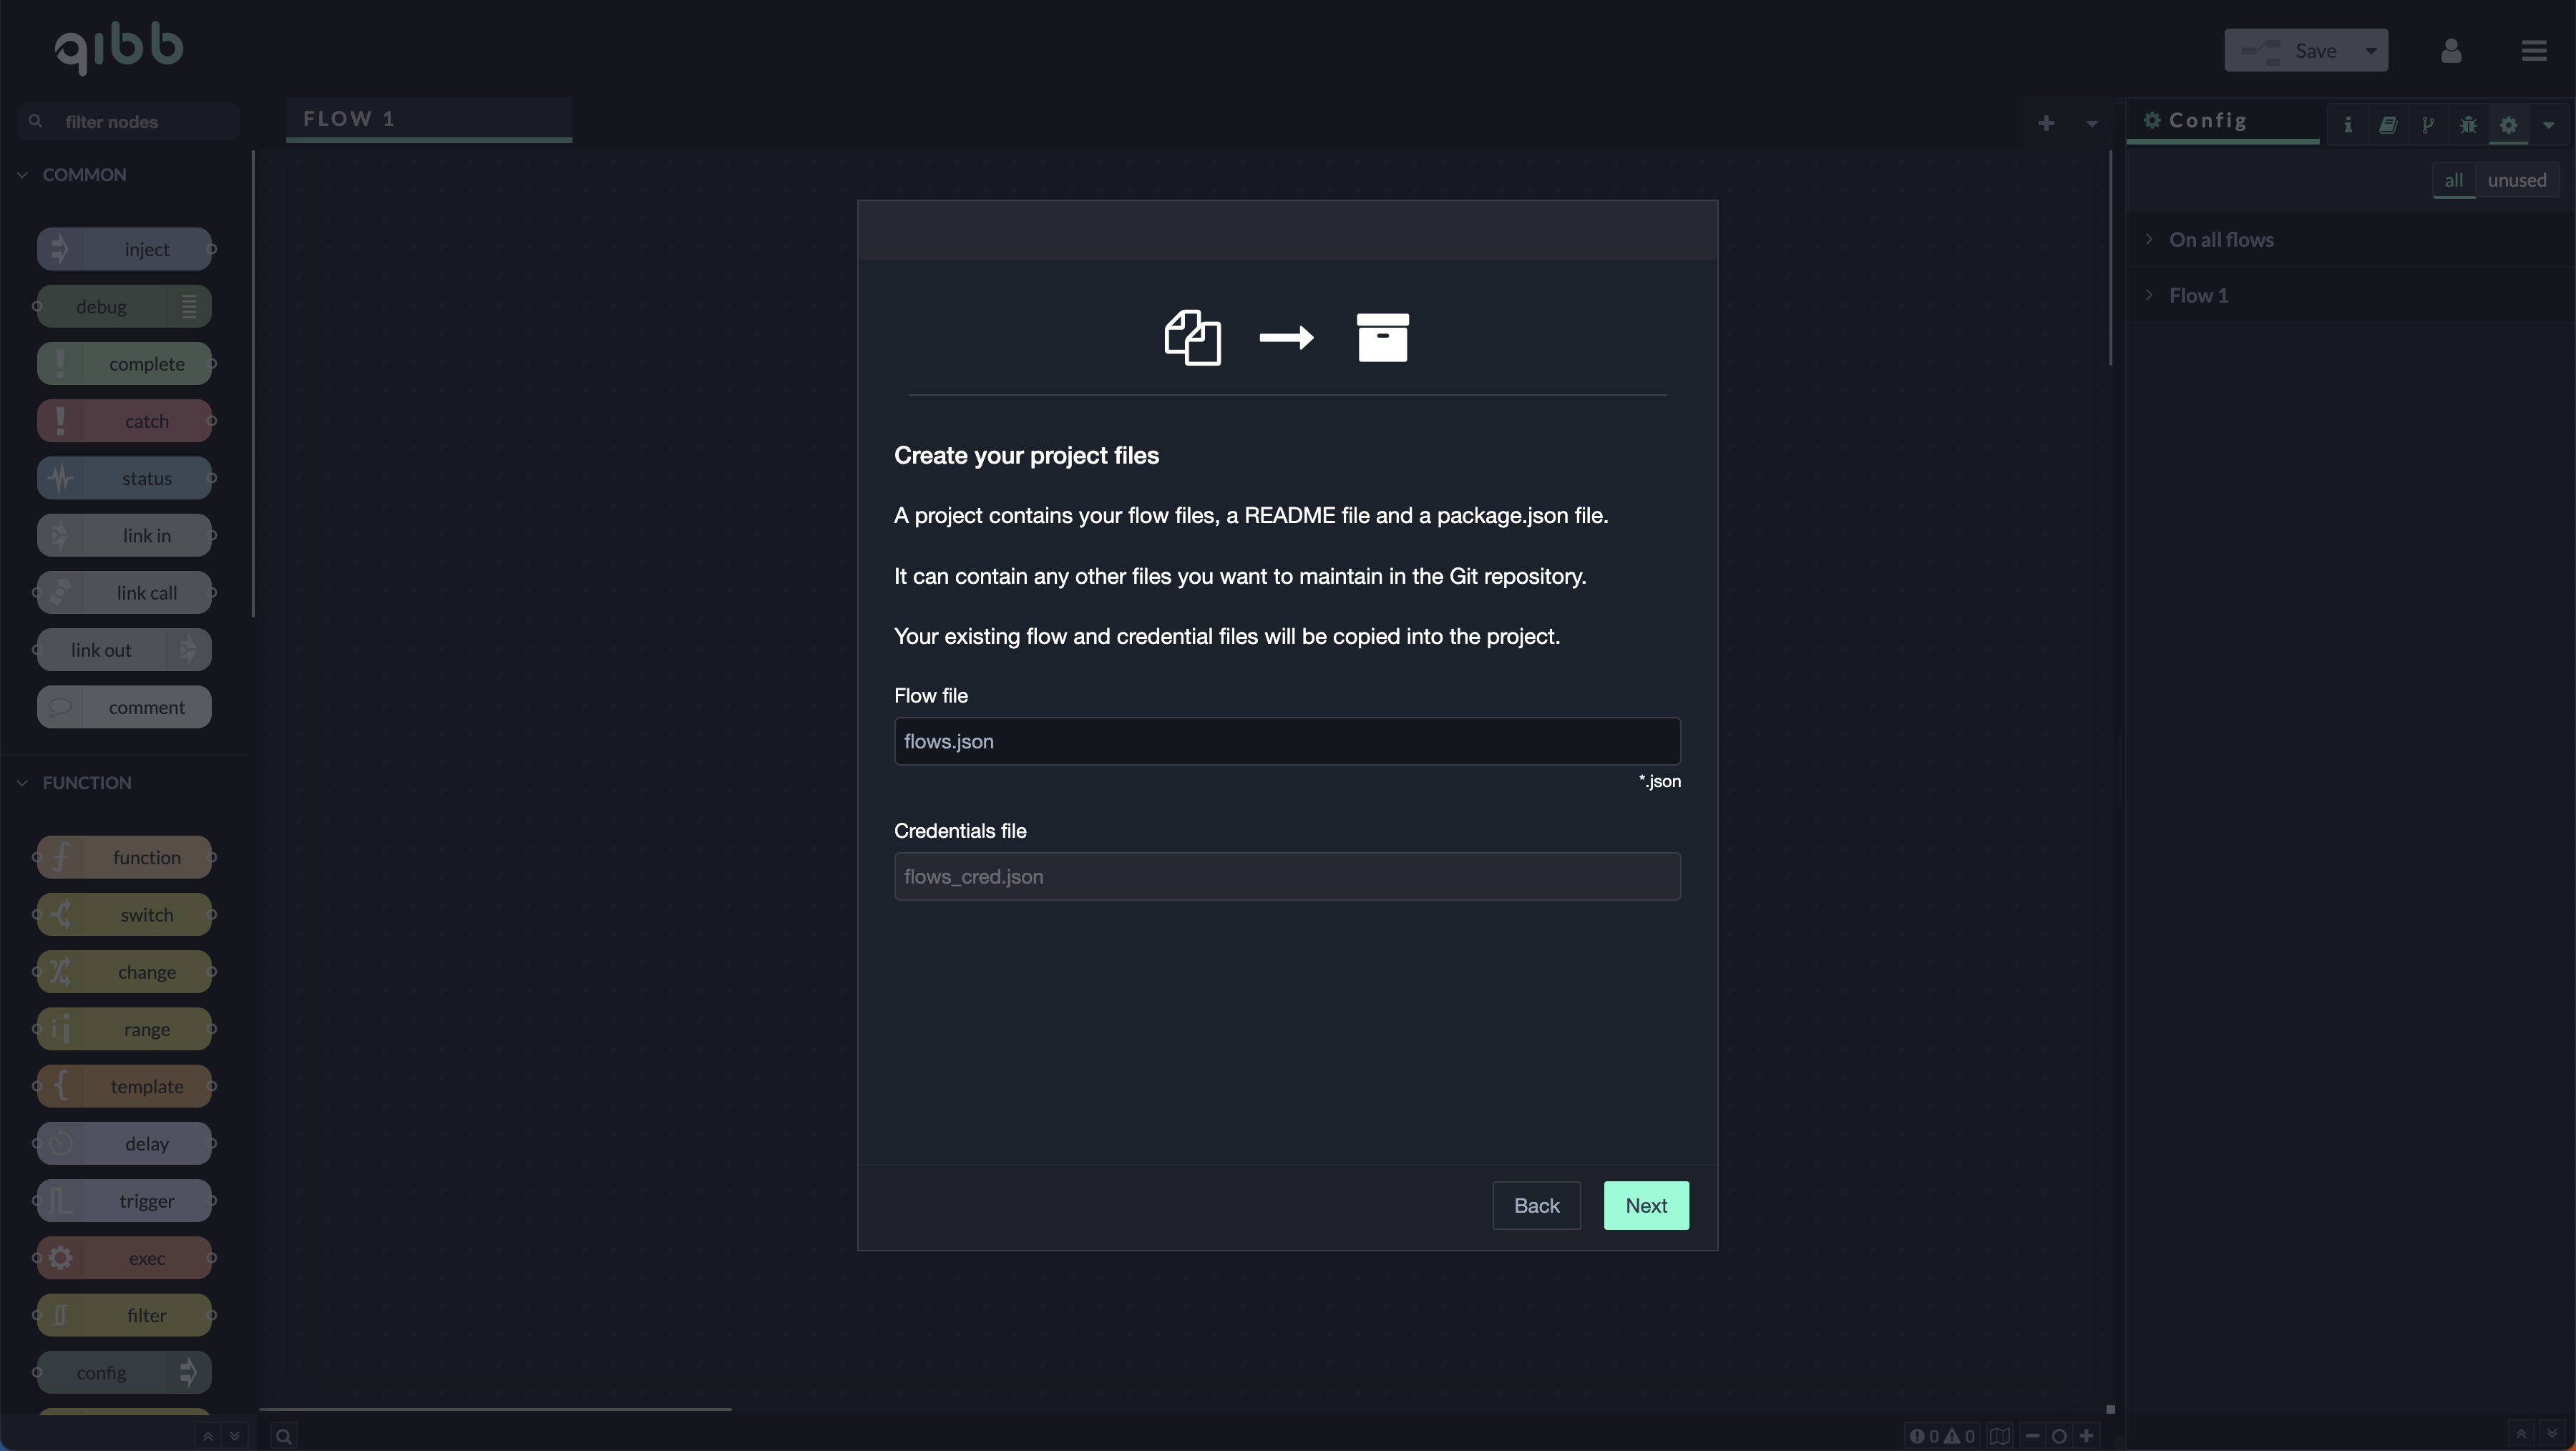
2. Create your project files
A project contains your flow files, a README file and a package.json file.
It can contain any other files you want to maintain in the Git repository.
Your existing flow and credential files will be copied into the project.
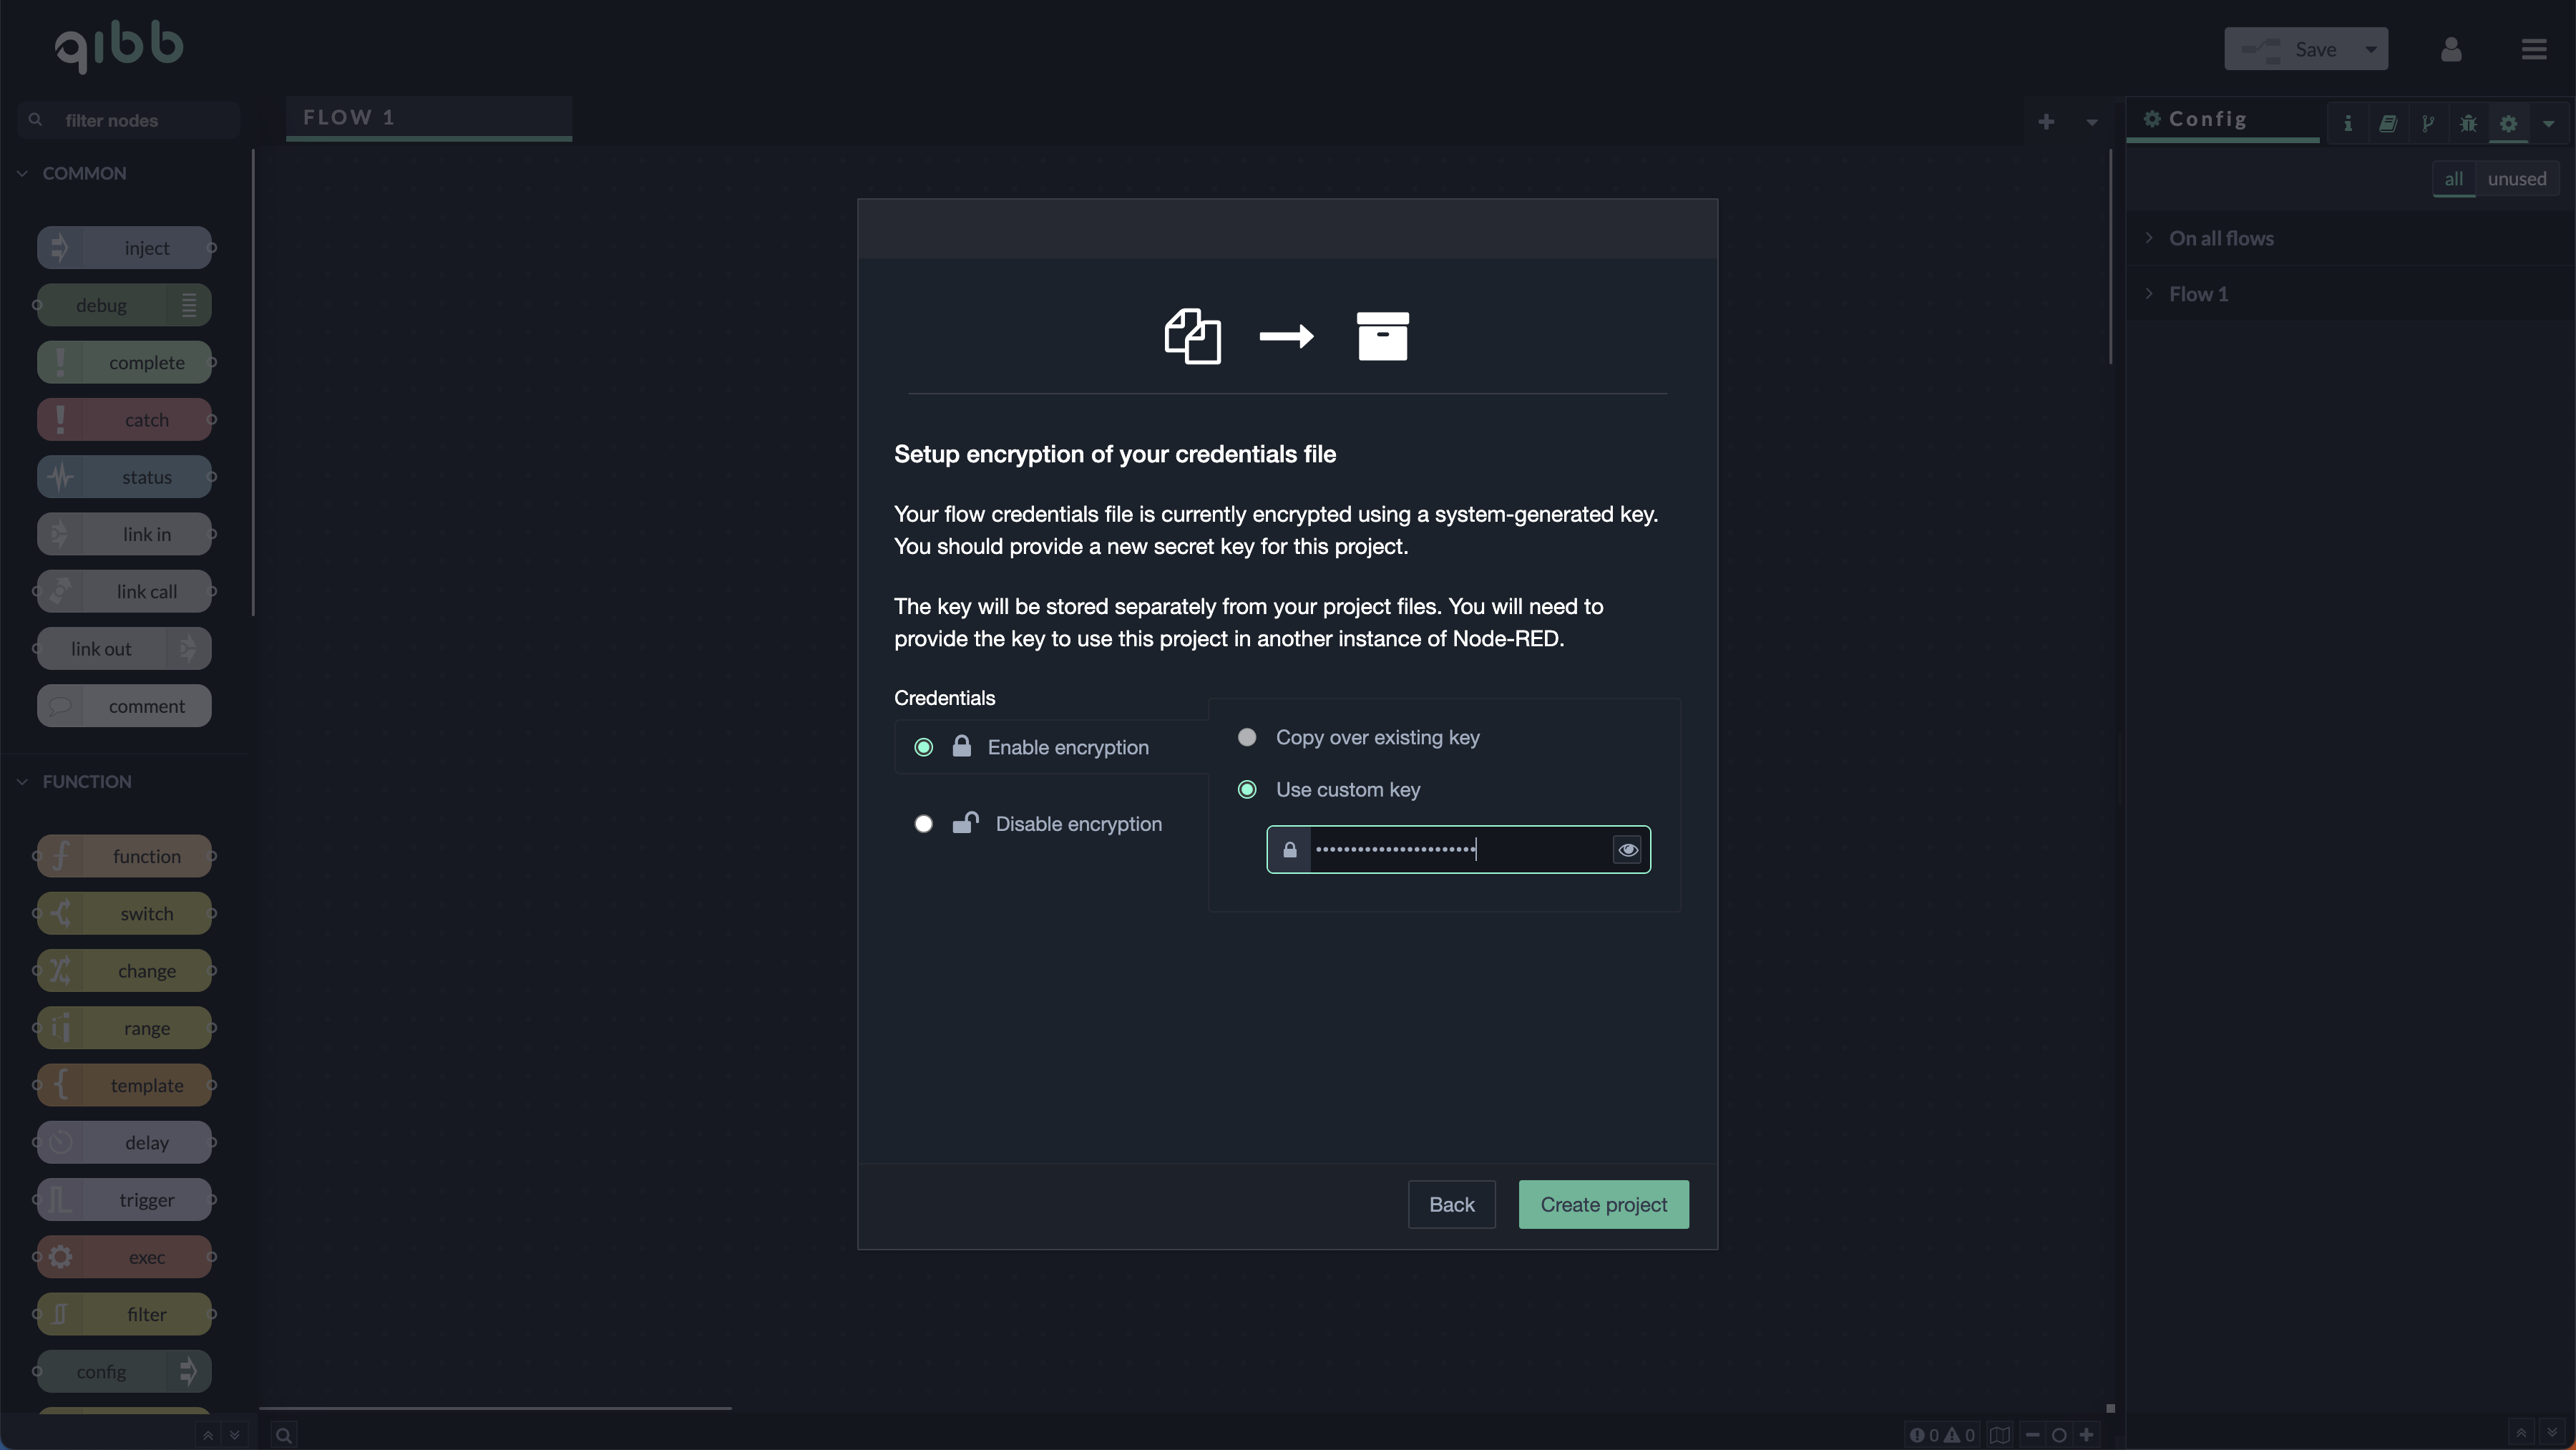
3. Setup encryption of your credentials file
If you plan to share your project on public platforms like GitHub, it is highly advisable to encrypt your credentials file. To do so, select a key that will secure the file. Please note that this key will not be stored within the project. If someone clones your project, you will need to provide them with the key to decrypt the credentials file. Alternatively, they can modify the flow to enter their own credentials.
Select the “Create project“ button to finish the project creation.
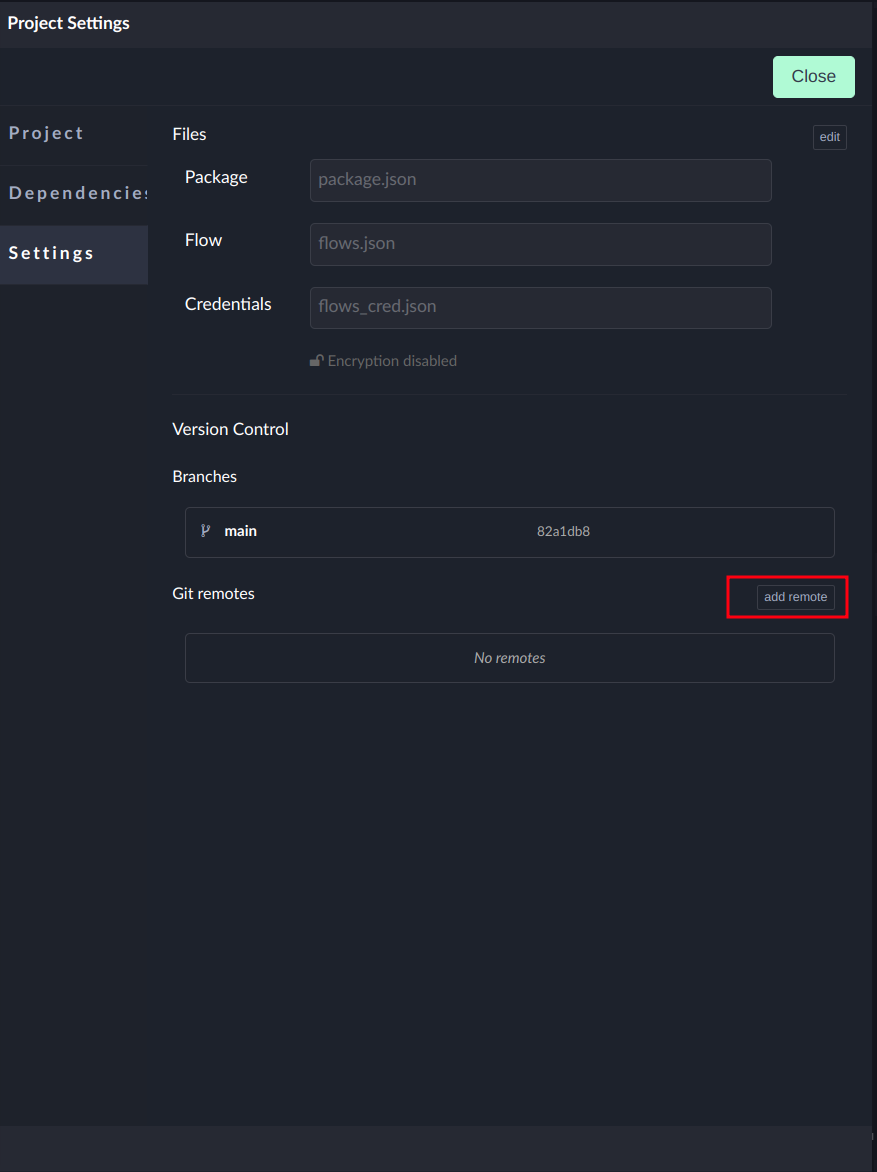
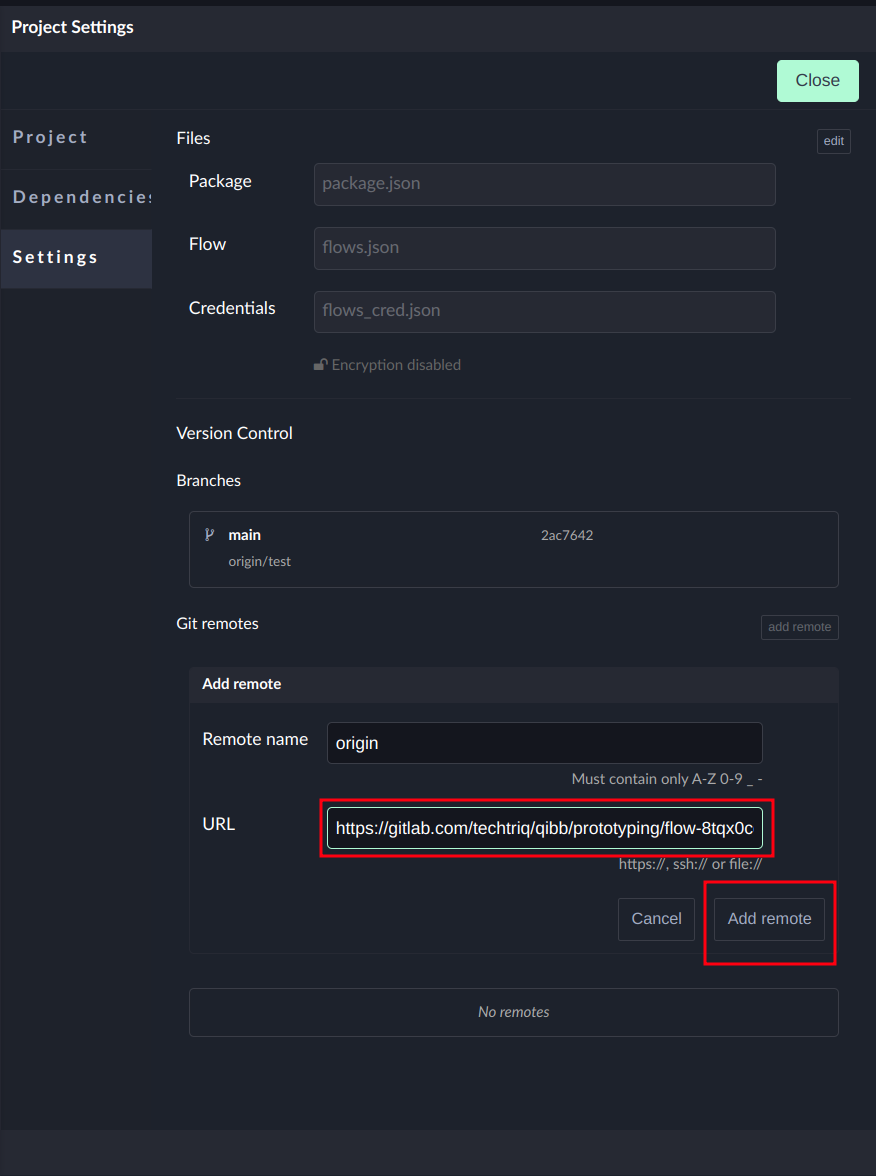
4. Add git remote
After creating the project, you need to configure the git repository remote to push changes. You can add a git remote by navigating to Menu -> Projects -> Project Settings to add the git remotes.
Click the “add remote“ button and enter your git remote url.
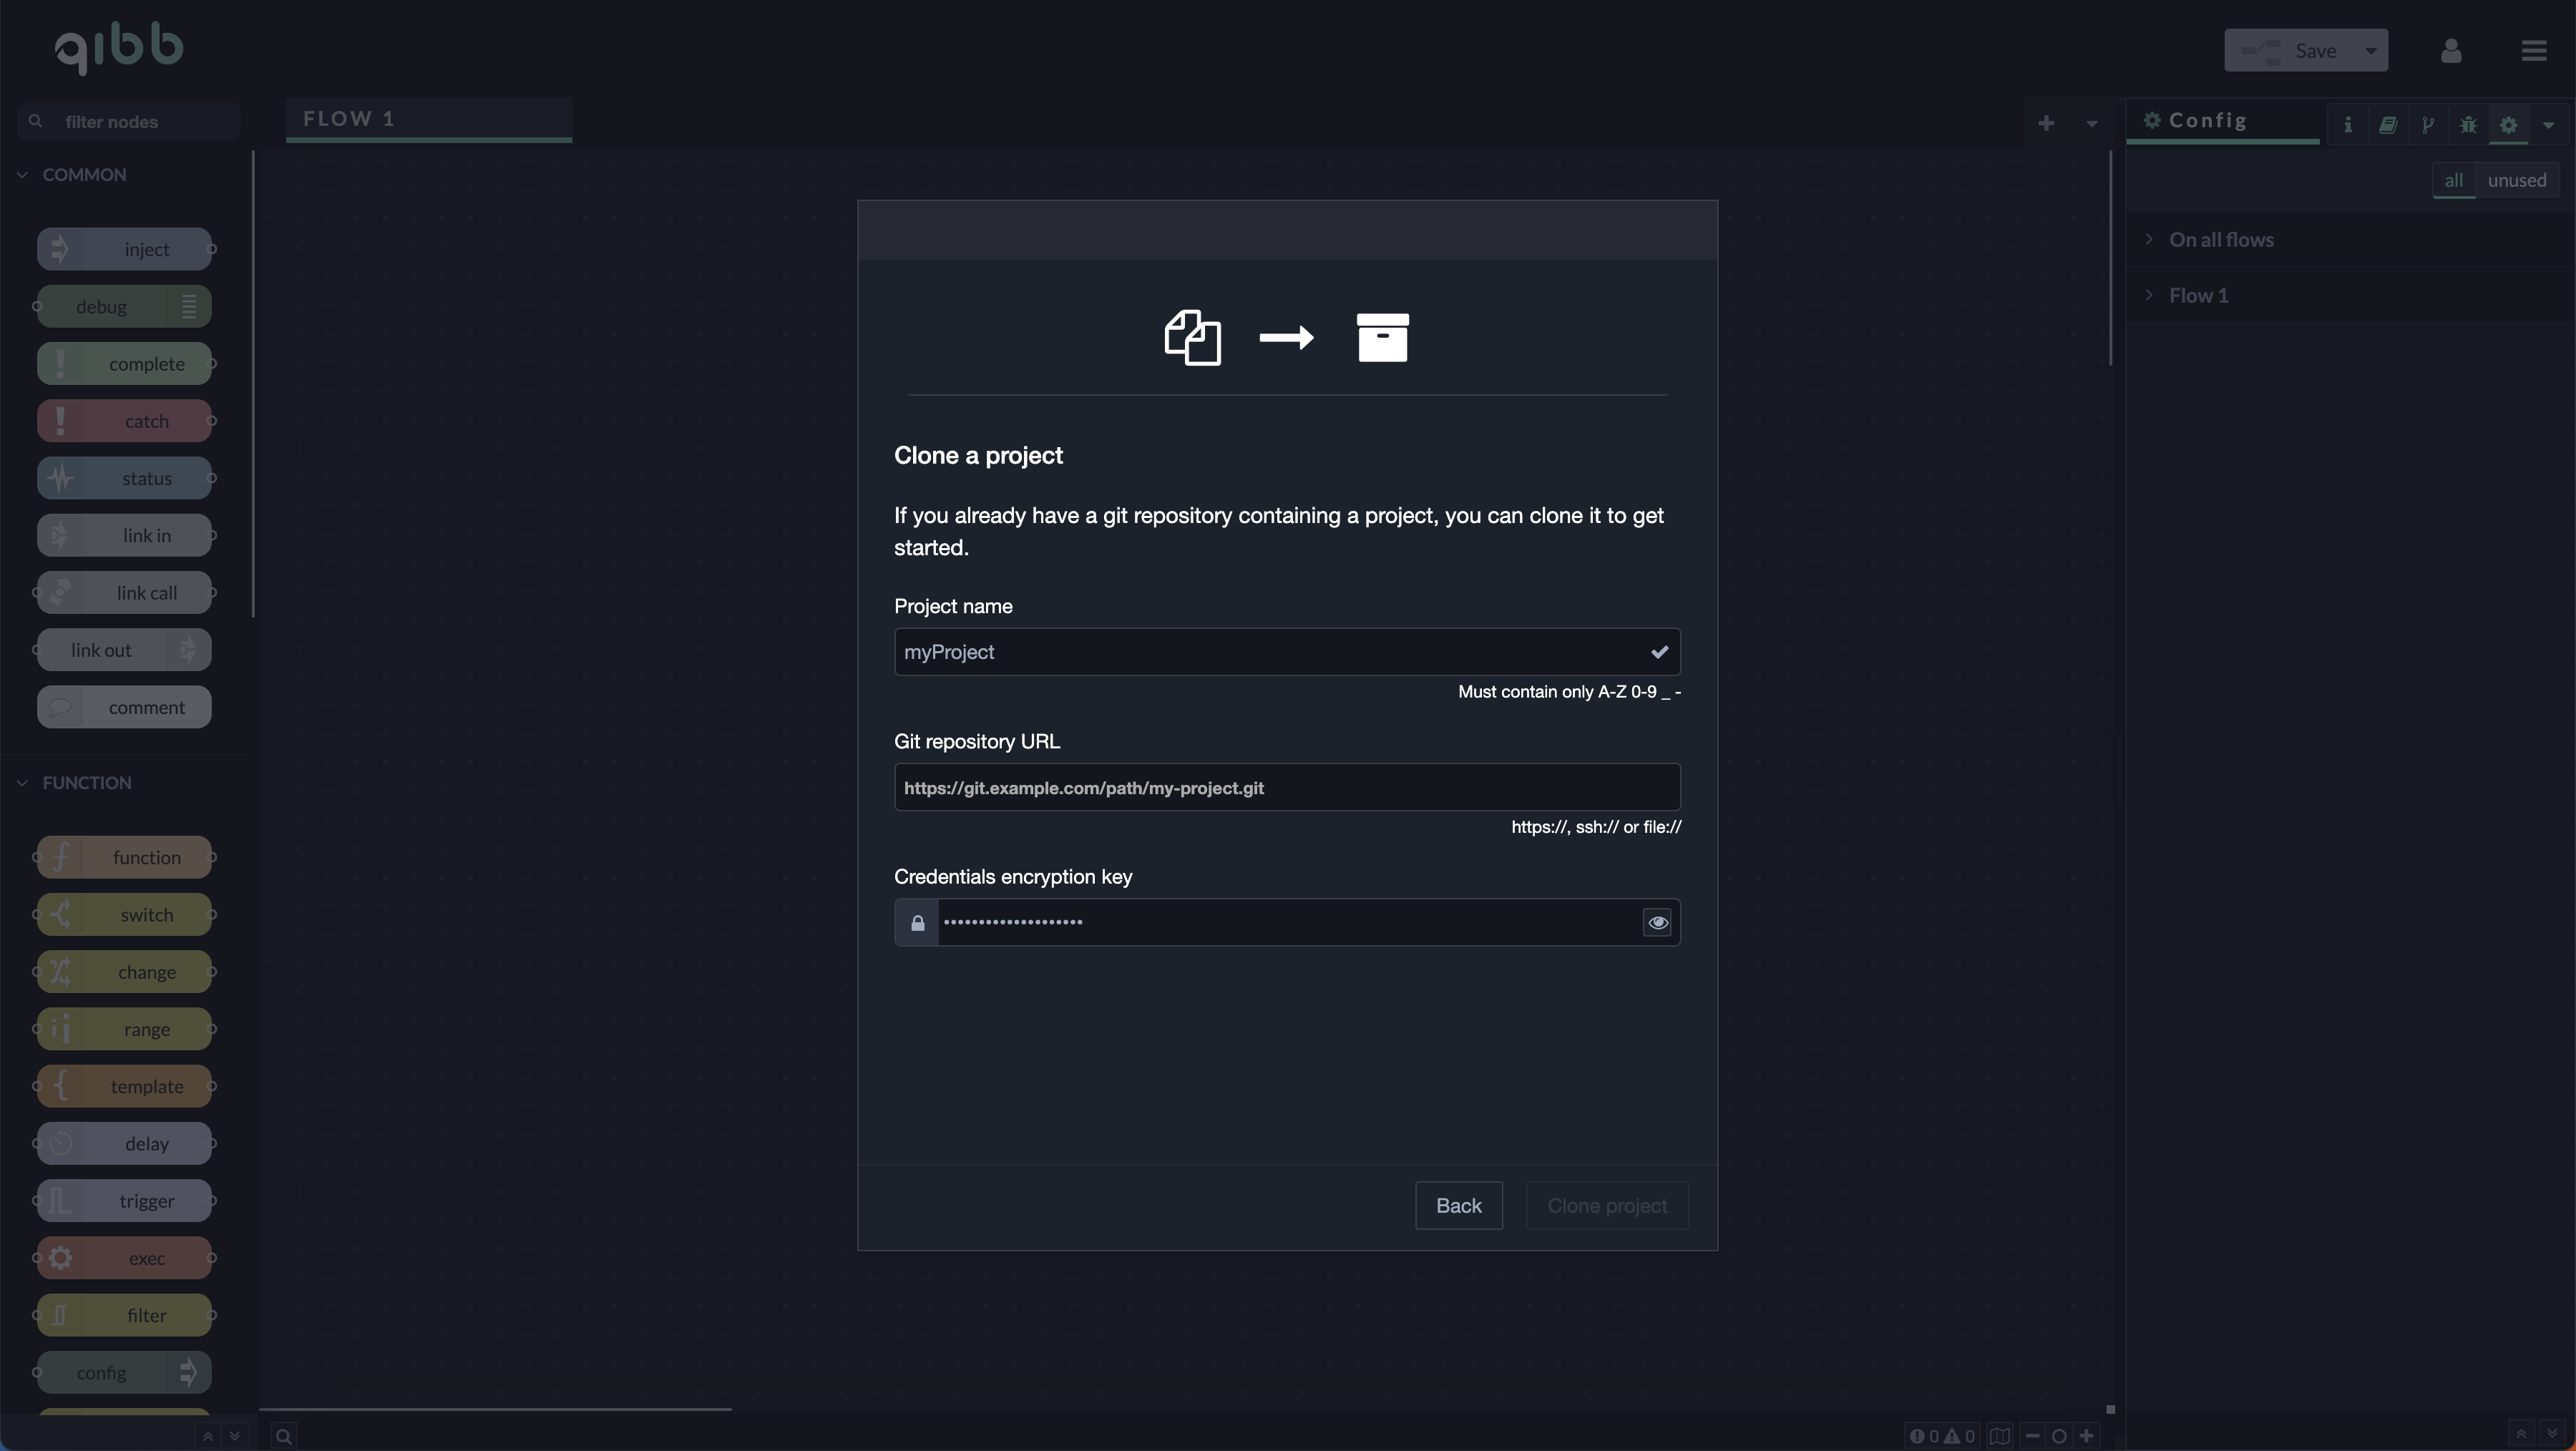
Clone Repository
You can use this feature to clone an existing remote repository, either via an http(s) or git/ssh url. If the repository requires authentication, you must provide it here.
Please note that for http urls, it is not advisable to include your username and/or password in the url itself. You should provide those separately when prompted.
For ssh urls from GitHub, you will need to change them from git@github.com:username/project to ssh://git@github.com/username/project.
Select the “Clone project“ button to finish the project cloning.
Open an existing project
The Flow Editor can only run one project at a time. When you open a different project, the running flows will be replaced.
In the "open project" view, you can delete projects by hovering over them in the list and clicking the delete button. However, you cannot delete the active project.
Version control
The sidebar now features a new history tab for managing the version control of your project. The tab consists of two sections:
-
Local Changes - This section displays project files that have been modified, allowing you to stage and commit them.
-
Commit History - This section is a list of all the commits made in the repository, including tools to push commits to remote repositories.
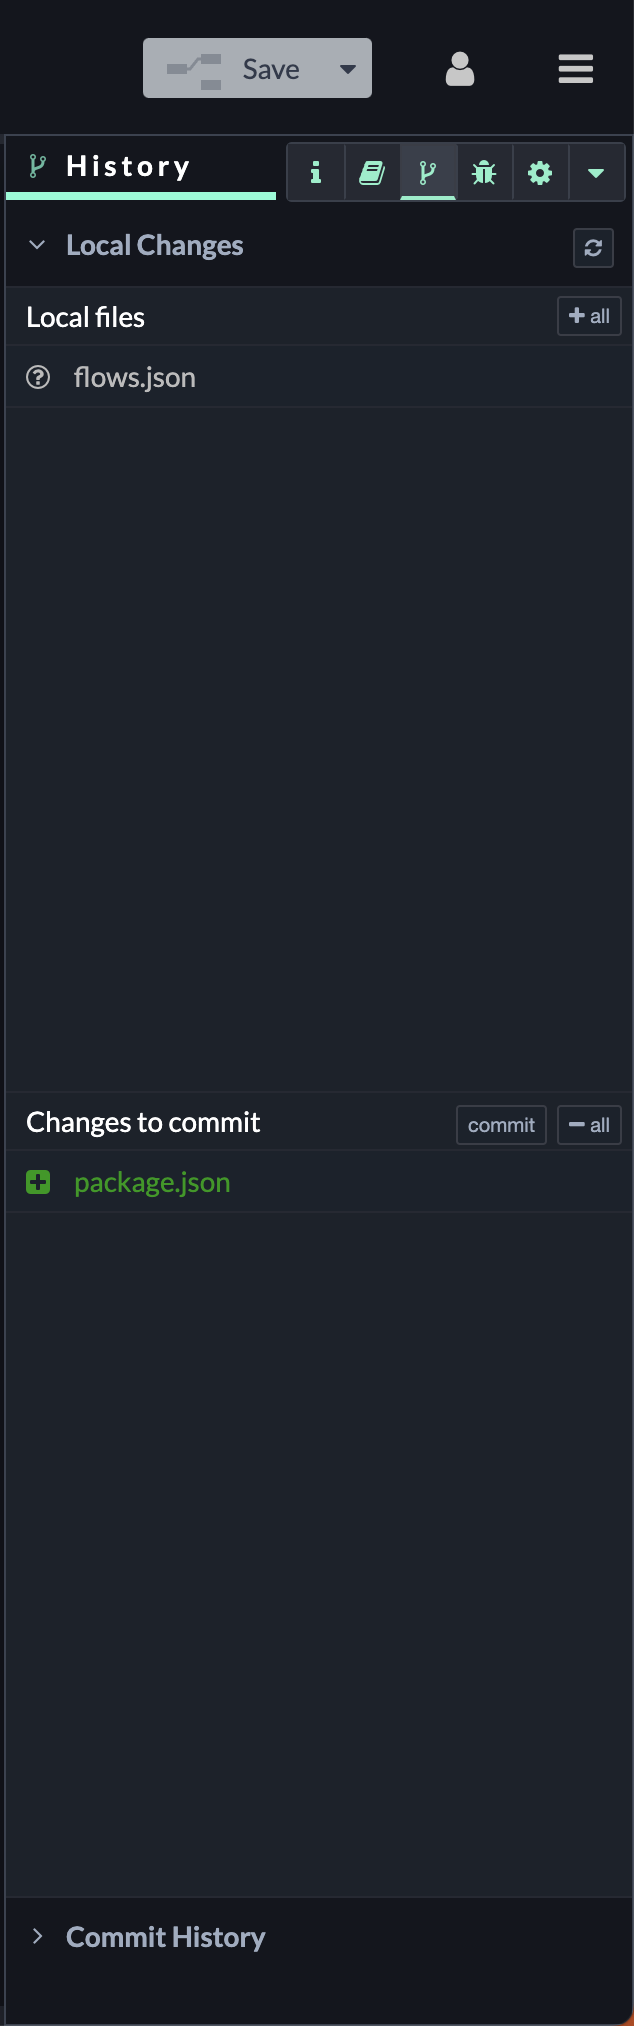
Local changes
Every time you modify a project file, for instance, by deploying a new flow configuration, it will appear in the "Local files" section. You can view a diff of the changes by clicking on the file name. If you hover over the file, a "+" button will appear. Clicking it will stage the file and move it to the "Changes to commit" list. Once you have staged all the files that you wish to commit, click on the commit button, enter a commit message, and confirm the action. Commit history
In the Commit History section, you can see all the commits made in the current branch of the repository. The Flow Editor automatically creates an initial set of default files for the project, which are also included in the list of commits. The 'Branch' button is located at the top of the list, which allows you to create or checkout branches within the repository. If your repository has a remote repository configured, another button shows the number of commits that your local repository is ahead or behind the remote repository. You can select the remote/branch to track and push/pull your changes to/from the remote. The Flow Editor tries to simplify the user experience in this area by not exposing all of the various options that Git provides. Feedback on this approach is welcome. For instance, options to rebase local commits or force push changes to the remote are not provided. However, you can still perform these tasks by using the command line. |
|
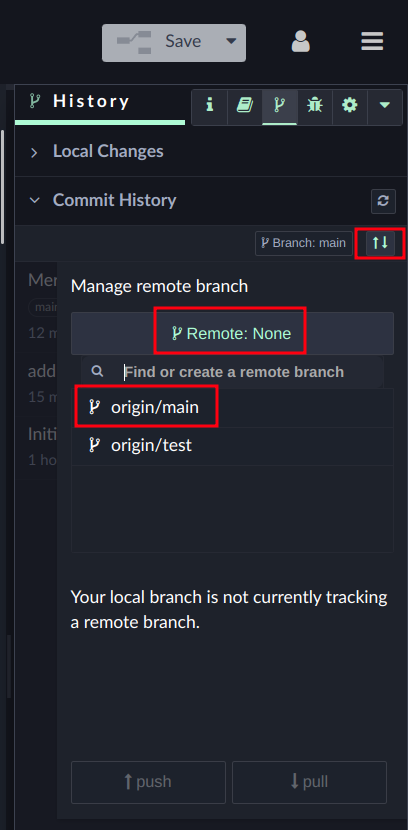
Push commits
If you've recently created a project and configured the Git remote URL, follow these steps to select your remote tracking branch:
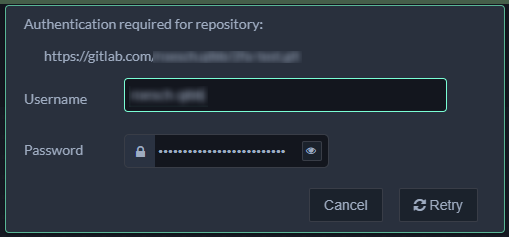
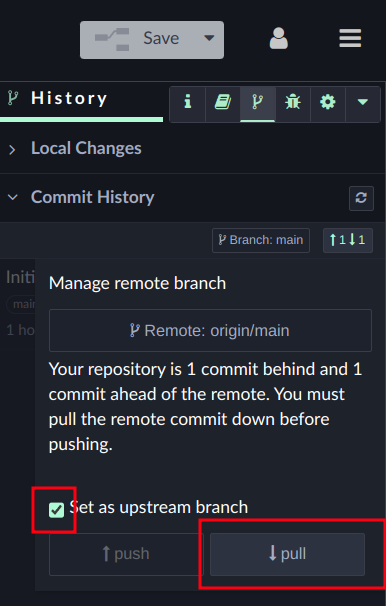
Navigate to History -> Commit History. Click the push and pull icon and then click “Remote: None”. This action will display a list of remote branches. Create or select the branch to which you want to push the commits. Please mind that you might get asked to authenticate with your Git credentials to access the repository. If you have set up two-factor authentication follow the steps in the related section below.
Set the selected or newly created remote branch as the upstream branch.
As the screenshot shows, your repository may require pulling the remote commit down before pushing. Click the pull button if necessary.
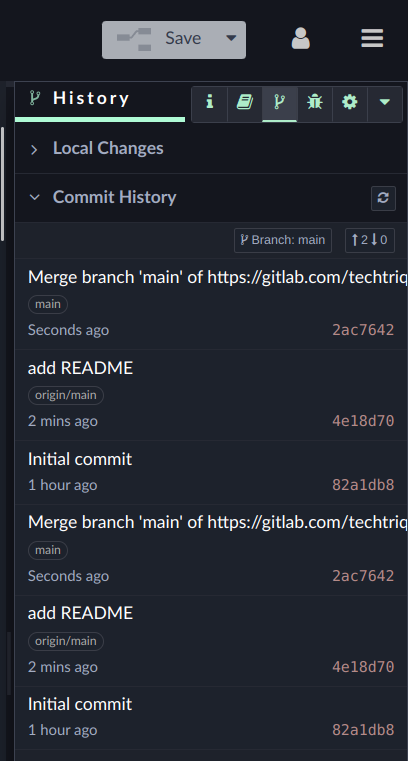
After pulling the remote commit to your local repository, you'll notice a new commit reflecting the merge of the remote branch into the local branch.
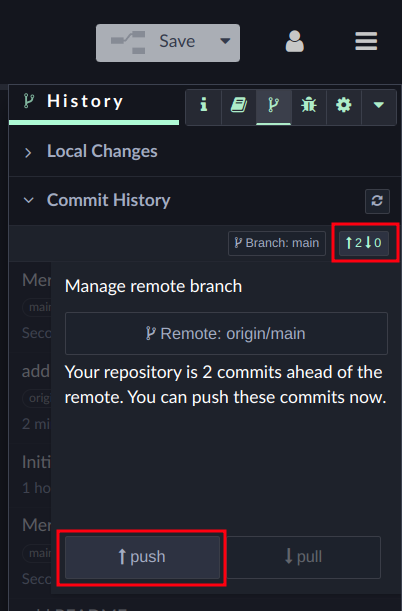
Now you can push your local changes to the remote Git repository. Referencing the screenshot, if you observe that you are two commits ahead of the remote, click the “push” button to push these commits.
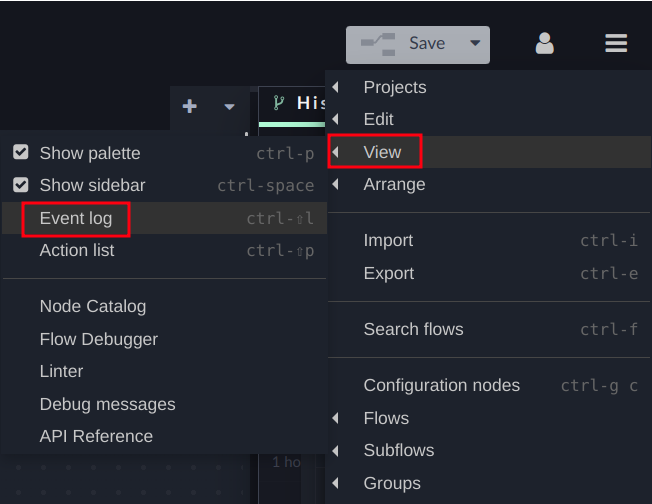
If any issues arise during a pull or push operation, navigate to Menu -> View -> Event Log to inspect error messages for troubleshooting.
Connecting repositories which require two-factor authentication
In case your git remote or git user is configured with two-factor authentication, you will need to create a personal access token in the according git system, which will by pass two-factor authentication. Gitlab users can follow the steps below. The detailed guide can be found here: Personal Access Tokens.
First navigate to the Access Token section in your Gitlab User Settings.
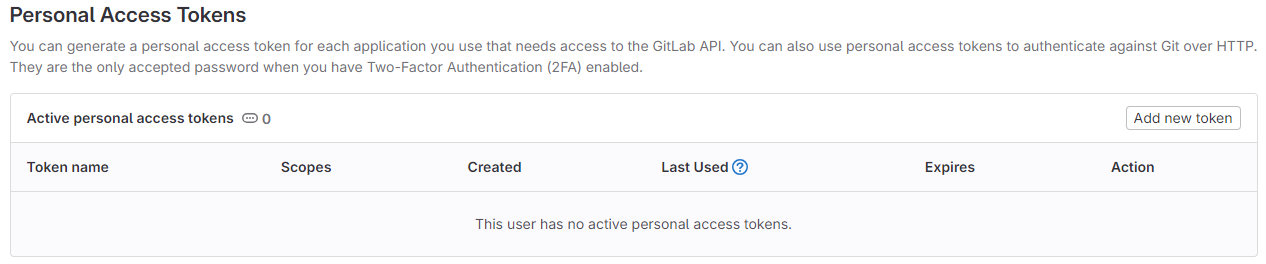
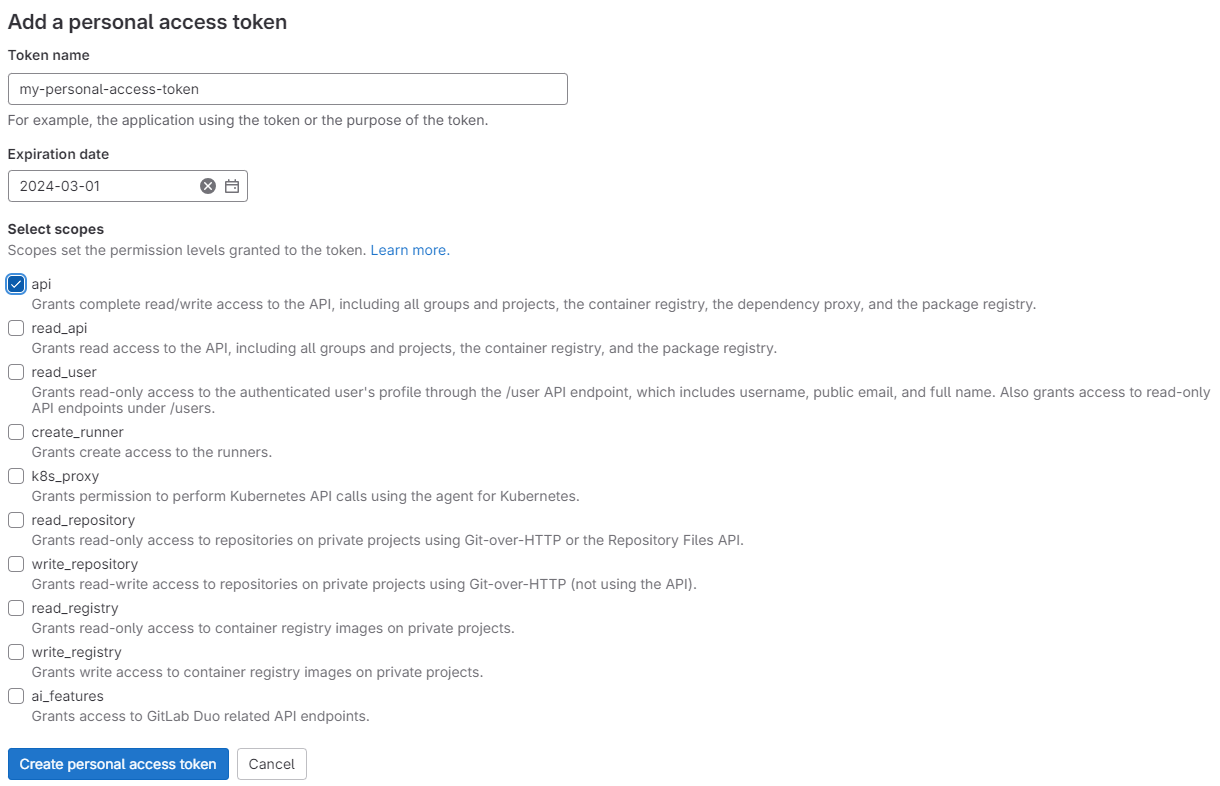
Click Add new token and put in the required information like token name, expiration date and the scope. To manage your repository, the scopes read_repository and write_repository are required. You can also select the scope api, which grants complete read/write access to the API, including all groups and projects, the container registry, the dependency proxy, and the package registry.
Click Create personal access token.
You will get a success message and the token will be listed in the Active personal access tokens table.
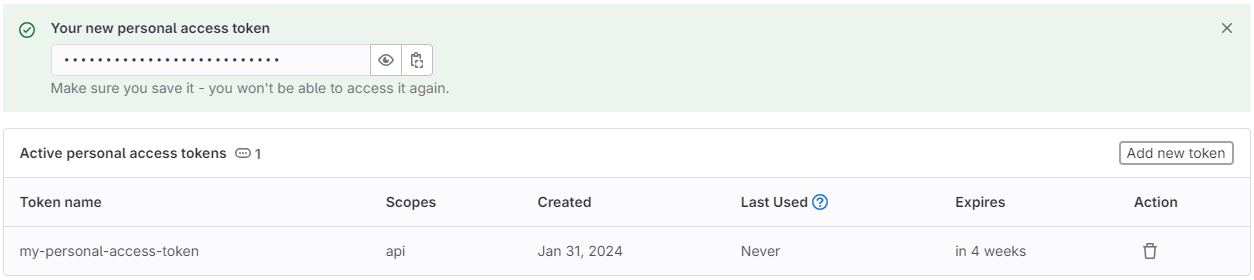
You can copy your token by clicking on the copy icon. When prompted in the Flow Editor to enter user credentials, enter the created token in the password field.