How To Authenticate OpenAPI in Flow Apps
Introduction
Most of our template flows are coming with an OpenAPI reference, providing end-users the capability to execute various commands using these APIs.
Almost all of the API endpoints created from the flow app are protected. We secure our APIs with OAuth2 and grant-type passwords. If you want to use our reference APIs you would need to first authenticate yourself.
This page is describing the process of accessing the API reference and the authentication process.
OpenAPI Reference
When you have already deployed your flows, you can access the OpenAPI reference from the API Reference button:
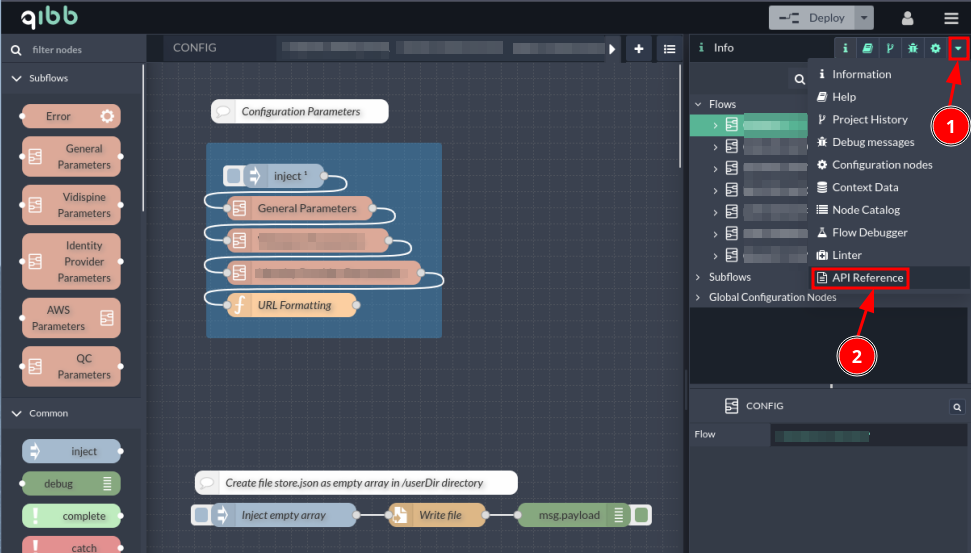
OpenAPI Reference
This would open a dedicated page with a new dialog box, where you can see all available API calls. You can then either click on the /http-api/openapi.json link to open this on a separate page, or copy the URL link and open it with an OpenAPI editor, such as https://editor.swagger.io/.
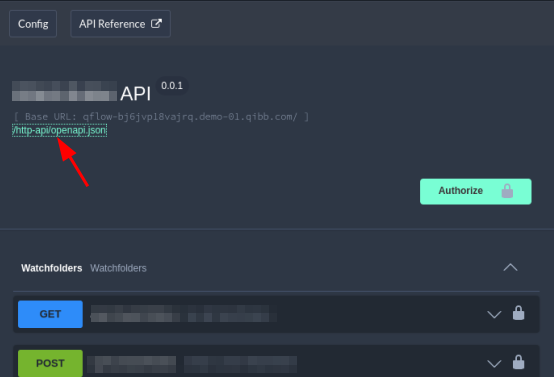
OpenAPI Reference URL Link
API Authentication and Authorization
In order to authorize yourself, you need to click on the Authorize button on your API reference as shown in the screenshot below.
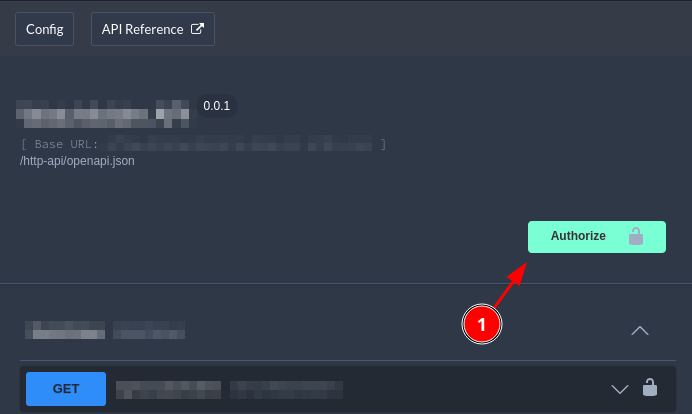
API Reference Authorization Button
Once you press the button a new dedicated dialog box would open up and you need to fill in it the following:
Username: your qibb username
Password: your qibb password
Public Client Id: the public client of the identity provider (IdP). Normally, it is created by qibb and provided to the customer and is similar to
flow-ui-<customer-name>
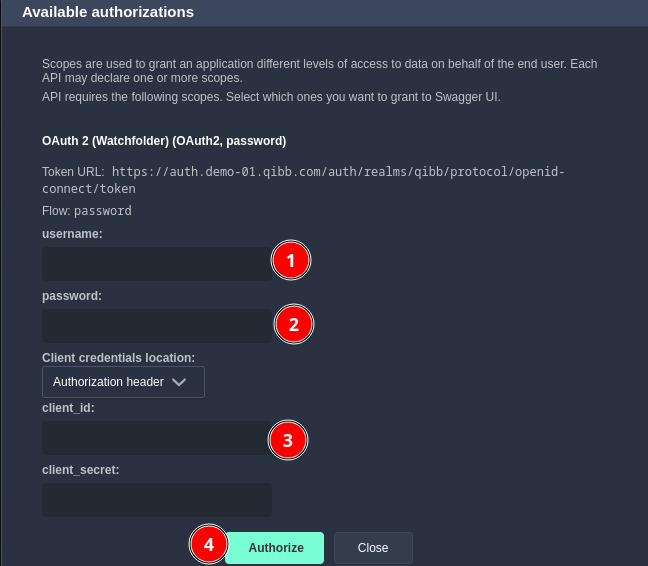
API Authorization Dialog Box
Please note that you DO NOT need to fill out the client_secret field, just leave it blank.
When you are ready, just click on the Authorize (4) button.
If everything is OK with your credentials, you would be presented with a window like the one below:
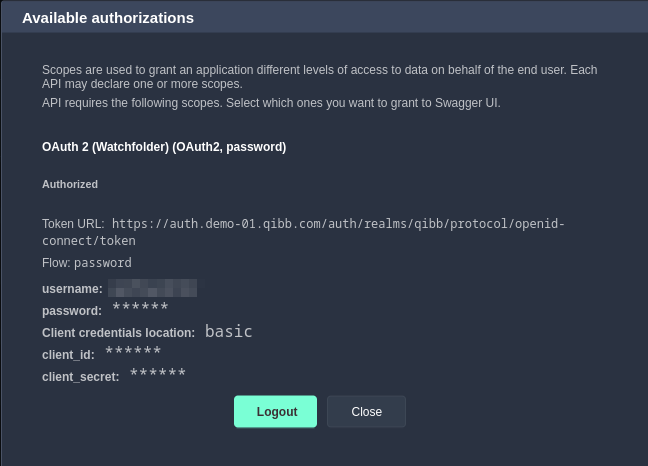
Successful Authorization
And if you close this window, you would notice that the small lock icon next to each API call has the lock closed in comparison to before, when the lock icon was unlocked.
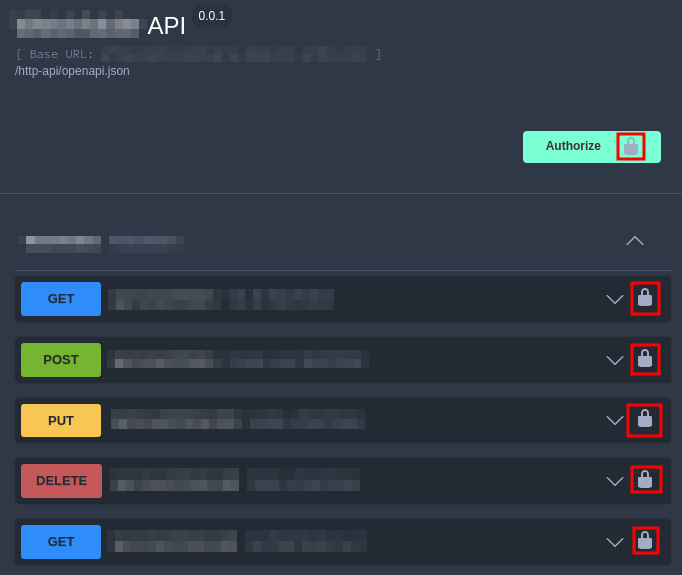
Successful API Authorization
Now you are ready to execute your API calls.
