Slack Integrations
Introduction
Slack is a widely-used team communication and collaboration platform. It offers a comprehensive selection of features that make working together as a team easier and more efficient, including channels, private messaging, file transfers, and popular third-party integrations.
Bot Creation
Bots are automated programs that can be created to perform various tasks, such as sending notifications, responding to messages, and performing actions based on certain triggers. To create a bot in Slack, you will need to follow these steps:
Navigate to https://api.slack.com/apps/ page and click on Create New App button.
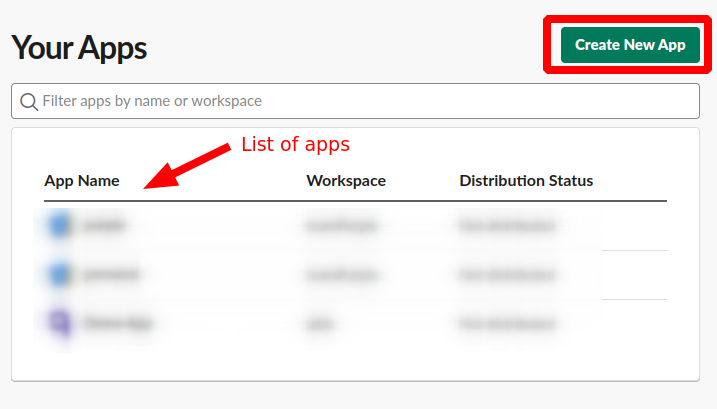
Create New App
Choose From scratch
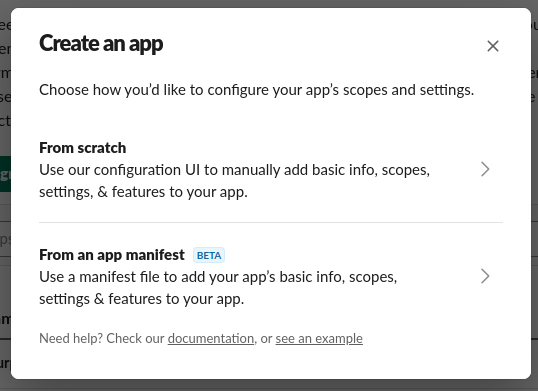
Create an app - From scratch
Provide a name for the app and choose the workspace for the app.
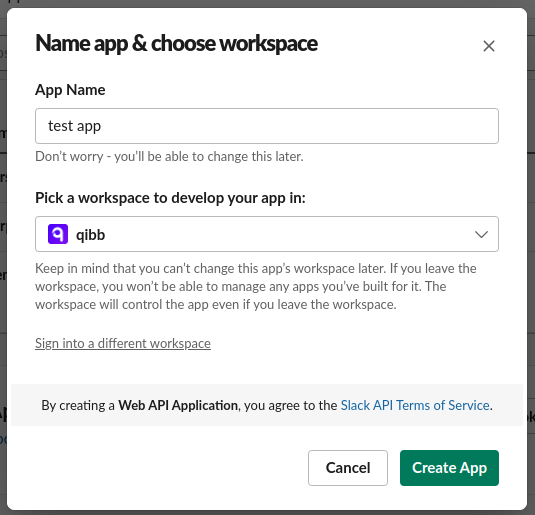
Create App - Final step
Click on OAuth & Permissions
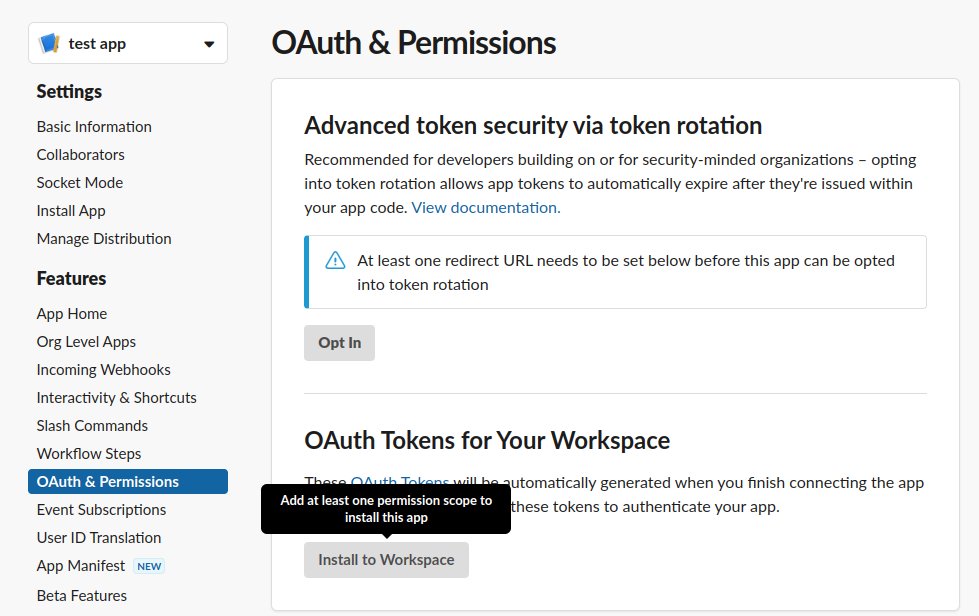
OAuth & Permissions
Here you need to add at least one permission scope to install this app. But feel free to add all the required scopes for the Bot Token scopes that are available.
Scroll down until you see the Scopes section. In the Bot Token Scopes part of the scopes section, click on Add permission by Scope dropdown which will list all the available scopes.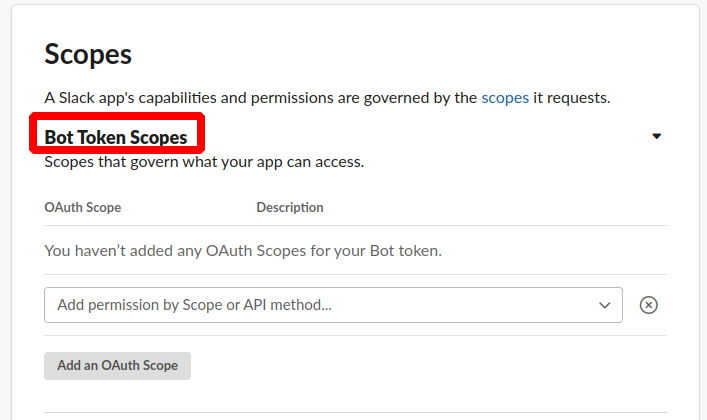
Add OAuth Scopes
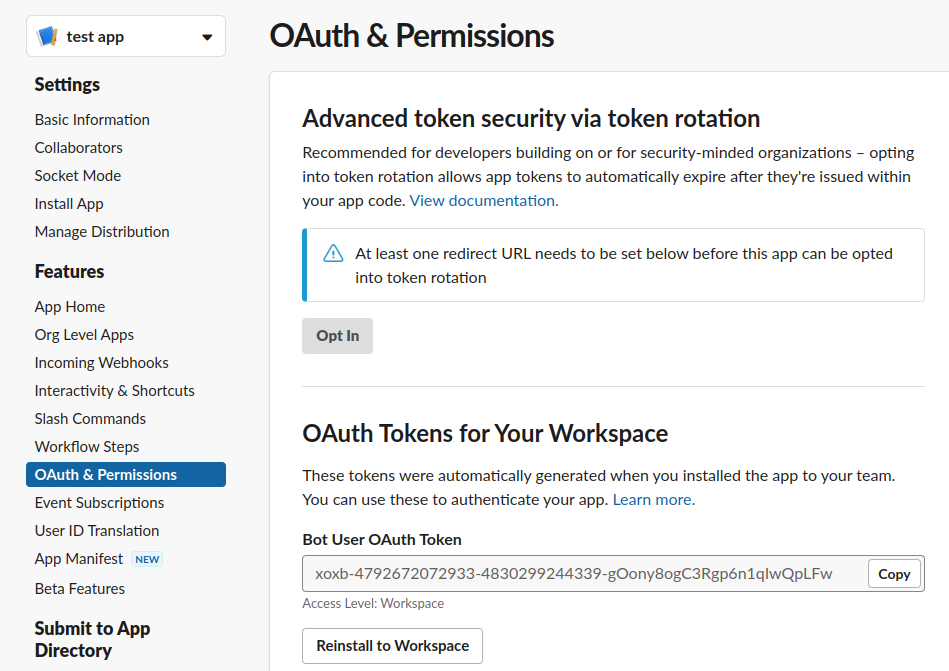
Click on Install to Workspace which will install the bot to the selected workspace
Copy the Bot’s OAuth token by navigating to OAuth & Permissions. This token is required to authenticate the bot with Slack.
Bot OAuth Token
Add Slack Integration to a Slack Channel
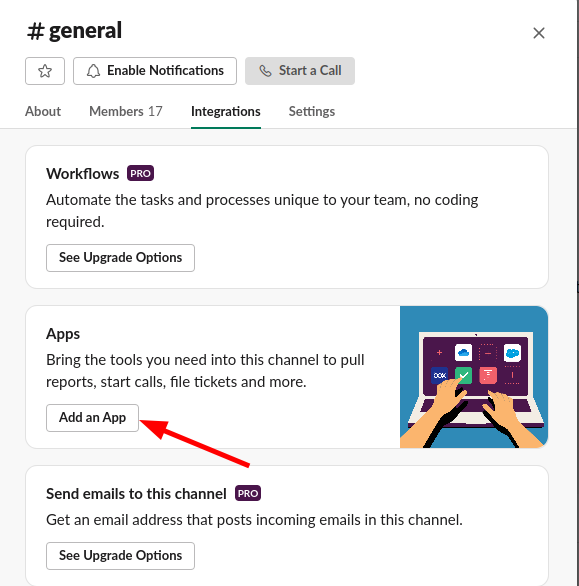
Now the only thing left is to add your Slack integration to the channel you want to interact with. Just navigate to the selected channel, and click on the people’s icon in the top right corner as shown below:

Add an Integration to a Slack Channel
Navigate to the Integrations tab and click on Add App and from the list, select your own integration. Now considering that you have set-up correctly the permissions for your integration, you should be able to send/read/interact with the notifications.
Add an App to a Slack Channel
Button Interactivity
Button interactivity is a feature in Slack that allows you to add interactive buttons to messages, which users can click to trigger specific actions. When a button in the message is clicked, by default it would show a warning icon next to the button after clicking.
There are some ongoing discussions on how to handle this warning. For more information: https://github.com/slackapi/node-slack-sdk/issues/869
This can be fixed by adding a redirect that will return a 200 status code.
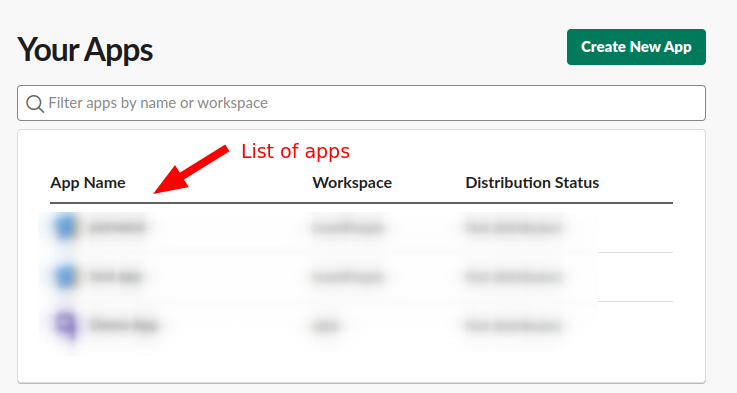
Choose the app where you want to have this interactivity button by going to https://api.slack.com/apps/
List of apps
Then click on Interactivity & Shortcuts.
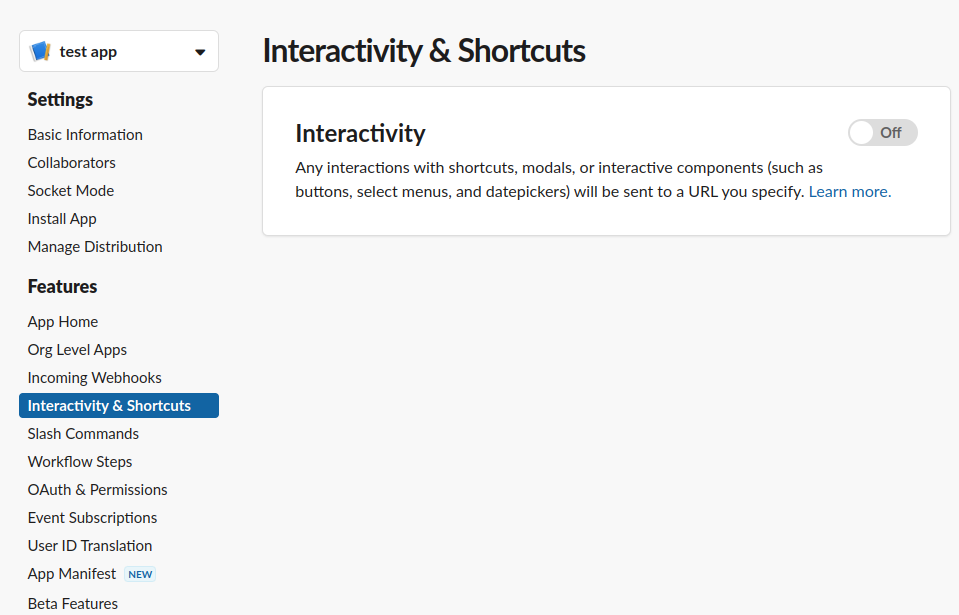
Interactivity
Turn on the Interactivity toggle button and put the URL that would always return
200as the status code. You could use the URL:https://httpbin.org/post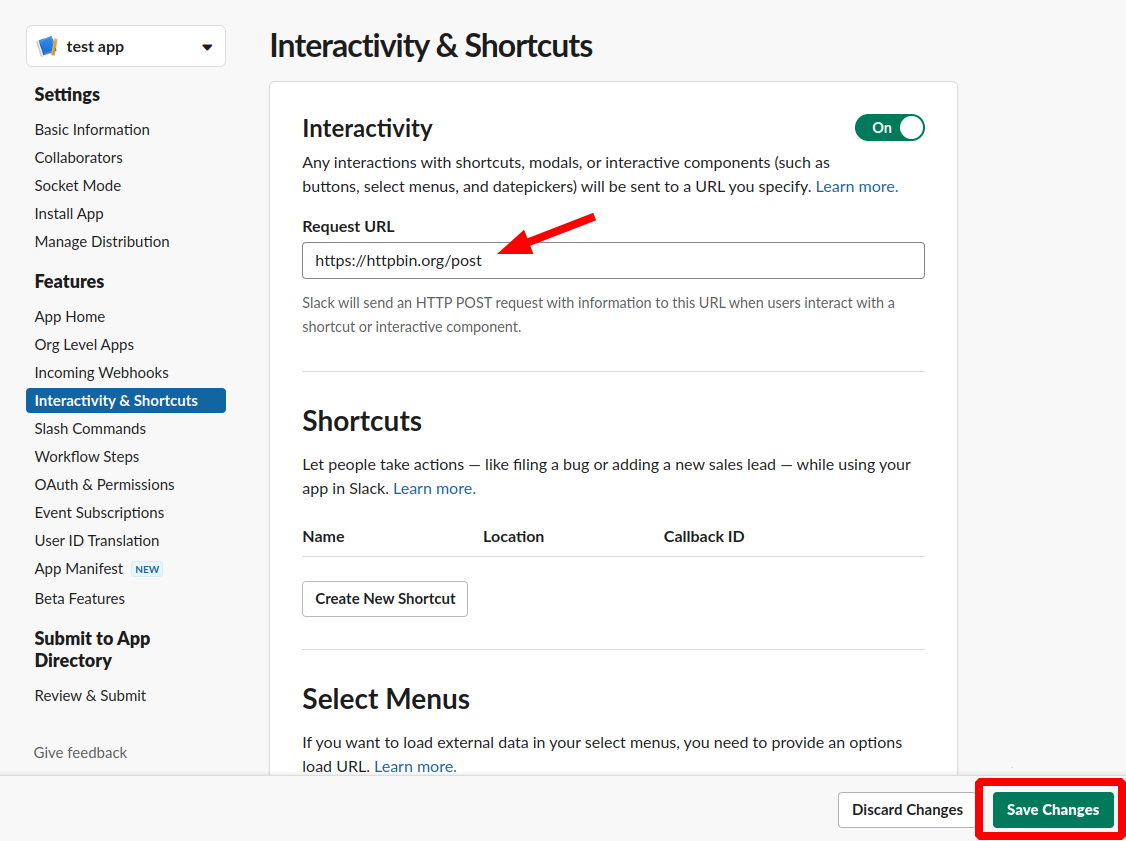
Interactivity URL
Then click on Save Changes.
Designing a Slack Notification
You can use the Slack bot to send and interact with Slack notifications. You can create your own design with the help of the Slack Block Kit Builder, available at https://app.slack.com/block-kit-builder where you can find various templates.
Slack is supporting markdown format, images, buttons, emojis, etc. so make sure to check their documentation: https://api.slack.com/messaging/composing/layouts#adding-blocks
Sending a Slack Notification
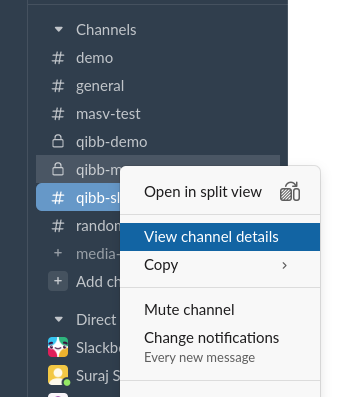
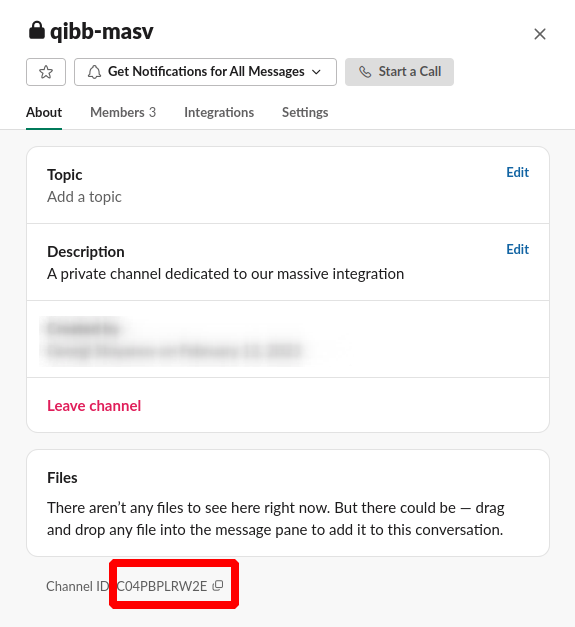
To send a Slack message on a particular channel, you need a channel ID. You can get it by right-clicking on the channel and then clicking on View channel details.
Channel List
Channel ID
After you have the channel ID and the Bot’s OAuth token, you can send a Slack message by sending a POST https://slack.com/api/chat.postMessage API call with a JSON body containing the message design that you have created with the Slack Block Kit Builder https://app.slack.com/block-kit-builder/.
curl -X POST \
     -H "Content-Type: application/json; charset=utf-8" \
     -H "Authorization: Bearer {botToken}" \
     -d @{pathToJSONBodyFile} \
     https://slack.com/api/chat.postMessage
In the above core, you need to provide the path to a JSON file containing the designed notification {pathToJSONBodyFile} and also the oAuth2 token that you generated above in the headers {botToken}.
Example JSON body:
{
  "channel": "{slackChannelId}",
  "blocks": [
    {
      "type": "header",
      "text": {
        "type": "plain_text",
        "text": ":rocket: New Files Available for Download",
        "emoji": true
      }
    },
    {
      "type": "divider"
    },
    {
      "type": "section",
      "text": {
        "type": "mrkdwn",
        "text": "The following package has been shared with you:_\n\n*Package Name:*            `Package1`\n*Number of Files:*           1"
      },
      "accessory": {
        "type": "image",
        "image_url": "https://qibb-solution-files.s3.eu-west-1.amazonaws.com/static/images/masv_logo.png",
        "alt_text": "MASV Logo"
      }
    },
    {
      "type": "divider"
    },
    {
      "type": "context",
      "elements": [
        {
          "type": "mrkdwn",
          "text": "You can download the package from the button below:"
        }
      ]
    },
    {
      "type": "actions",
      "elements": [
        {
          "type": "button",
          "text": {
            "type": "plain_text",
            "text": ":arrow_down_small: Download",
            "emoji": true
          },
          "style": "primary",
          "value": "click_me_123",
          "action_id": "actionId-0",
          "url": "https://qibb.com"
        }
      ]
    }
  ]
}
Make sure to change the change the slackChannelId and that your Slack integration has an access to this particular channel