Cat as a Service (CaaS)
Introduction
This assignment is a fun example of how to use the qibb Flow Editor to query and display amusing cat pictures directly within the editor. For more information about the project, visit https://cataas.com/.
Assignment
API Documentation
You can find the official API documentation at https://cataas.com/doc.html.
The assignment section is divided into two parts:
Simple Assignments - These require relatively low effort.
Advanced Assignments - These are optional and require more effort to complete.
Simple Assignment
Contrib Image Module
Both assignments require the installation of a third-party module: https://flows.nodered.org/node/node-red-contrib-image-output. To install it, follow these steps:
Open the flow editor.
Click on the hamburger menu in the top right corner.
Select "Manage Palette".
Switch to the "Install" tab.
Type
node-red-contrib-image-outputin the search field and install the module.
This assignment involves using the HTTP request node to fetch a random cat picture and display it in the flow editor. Follow these steps:
Place an inject node on the canvas.
Use a change node to configure the URL (
https://cataas.com/cat) and set the method toGET.Add an HTTP request node and configure it accordingly.
Add the image node (which should now be available in your left sidebar) and run the flow. If everything works correctly you should see your cat directly in the qibb flow editor.
Cat GIF
Alternatively, you can request a cat GIF (Graphics Interchange Format). You can see how athttps://cataas.com/
Hint: This option is not included in the API documentation.
Hint: You can enlarge the image width for a more expansive view, double-click on the image node, and set the width to 300, or more.
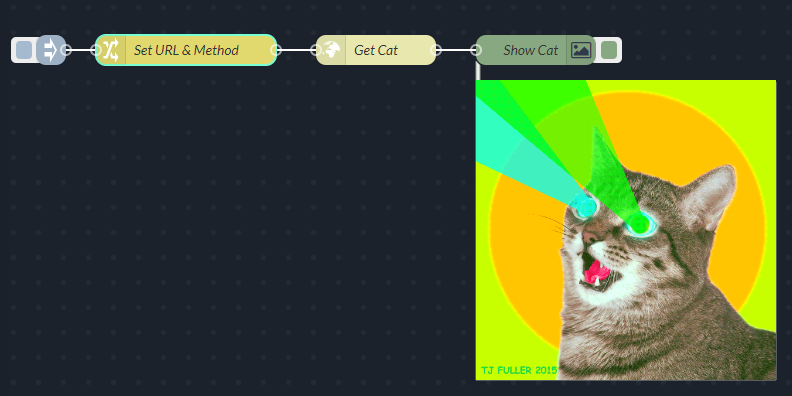
Figure 1: Example Implementation
This exercise is similar to the previous one, but this time we will use the qibb OpenAPI node to query the API.
Install the Qibb OpenAPI Client Node. For more information on how to install it, refer to the documentation.
Place an inject node on the canvas.
Place an OpenAPI Client Node on the canvas and configure it by adding a new connection. Set the URL to the OpenAPI JSON file (
https://cataas.com/doc.json) and the host. Select theGET /catoperation. In the general tab, you can configure separate error handling to have two outputs for the OpenAPI Client node:The first one for responses with status codes 2XX
The second is reserved for responses containing either 4XX or 5XX error status codes.
Finish by adding an image node and run the flow. If everything works correctly you should see your cat directly in the qibb flow editor.
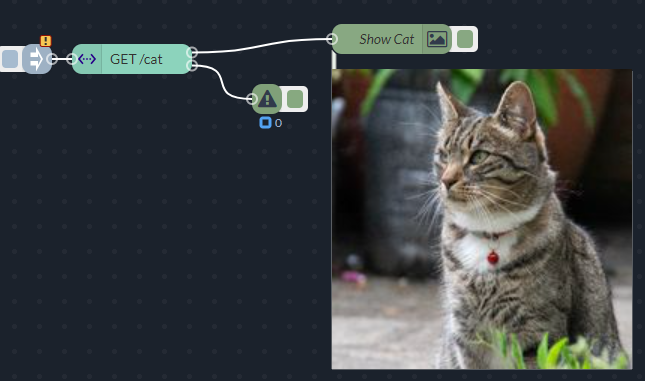
Figure 2: Get Cat Picture Using qibb OpenAPI Client Node
Advanced Assignment
In this assignment, we will fetch all cat tags, select a random tag, and display a cat with this tag. Additionally, we will customize the font color, size, and overlay text using the query parameters.
OpenAPI Client Node
This assignment assumes you have the OpenAPI client node installed as described in qibb OpenAPI node and https://docs.qibb.com/platform/latest/using-the-qibb-node-catalog-plugin
Place an Inject node on the canvas.
Place an OpenAPI Client node pointing to the on the Canvas and Configure it:
Select the
GET /api/tagsoperation. This operation will return an array with all possible cat tags.You can also set the Error Handling to separate in the general section for better error management.
Add a Change node and configure it:
Set the
msg.tagsto the output of the OpenAPI client.Set the
msg.toto the length of the tags array minus one.
Use the Random node to generate a random number between 0 and the length of the array containing all tags (
msg.to).Add another Change node and:
Use a JSONata expression to set the cat tag (
msg.tag). The random number generated by the preceding node can be used to fetch a tag with this particular index. Be careful about the local and root JSONata context (https://docs.jsonata.org/programming#built-in-variables).Declare
msg.fontSizeand set it to 50. This will be the font size of the text overlay on the cat image.Define
msg.fontColorand set it to red. This will be the font color of the text overlay on the cat image.Use a JSONata expression to set the
msg.textto the chosen tag and the string "cat". E.g. if the random tag is fluffy, the value ofmsg.textwould be “fluffy cat”.Delete the
msg.payloadas it might interfere with the following HTTP request node.Delete the
msg.headersas it might interfere with the following HTTP request node.
Place another OpenAPI Client node and configure it:
Set the operation to
GET /cat/{tag}/says/{text}.Inside the node, set:
Tag path parameter to
msg.tagText path parameter to
msg.textFontSize query parameter to
msg.fontSizeFontColor query parameter to
msg.fontColor.
Add an Image node and run the flow. If everything is working correctly, you should see a random picture of a cat with the tag name and the word "cat" overlaid on the image similar to the screenshot below:
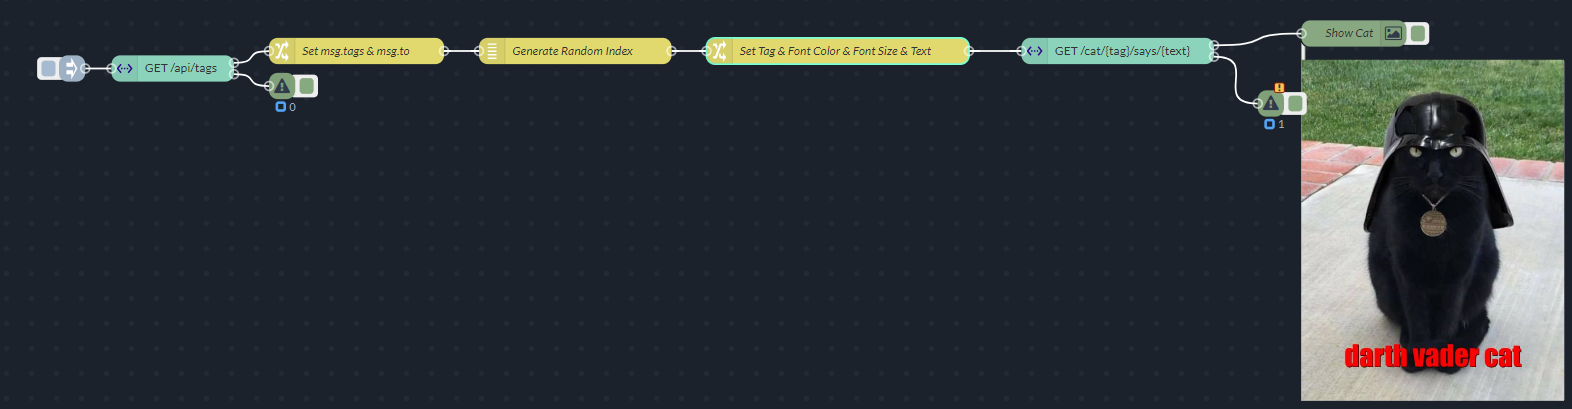
Figure 3: Example Flow for Displaying a Random Cat Image by Cat Tag
Setting the Tag
If you encounter difficulties setting up the cat tag in Step #5, consider replacing the change node with a function node.
Submission
Export your Node-RED flow as a JSON file.
Share the JSON file and description as your submission.
Best of luck!