Introduction
The IN2IT platform is a solution for handling media processing tasks. IN2IT features a flexible workflow engine that includes multiple connectors and workers, making it easy to integrate with industry-leading solutions. The platform is designed to be easy to configure and use, empowering engineers to build complex workflows quickly. IN2IT is suitable for all organizations, from small production facilities to large international broadcast networks.
To learn more about supported operations, visit Woody IN2IT | qibb Catalog.
How to get started with Woody IN2IT integration
Before getting started with Woody IN2IT integration, please ensure that you have the necessary permissions for the operations.
To integrate Woody IN2IT with your workflow, follow these steps:
-
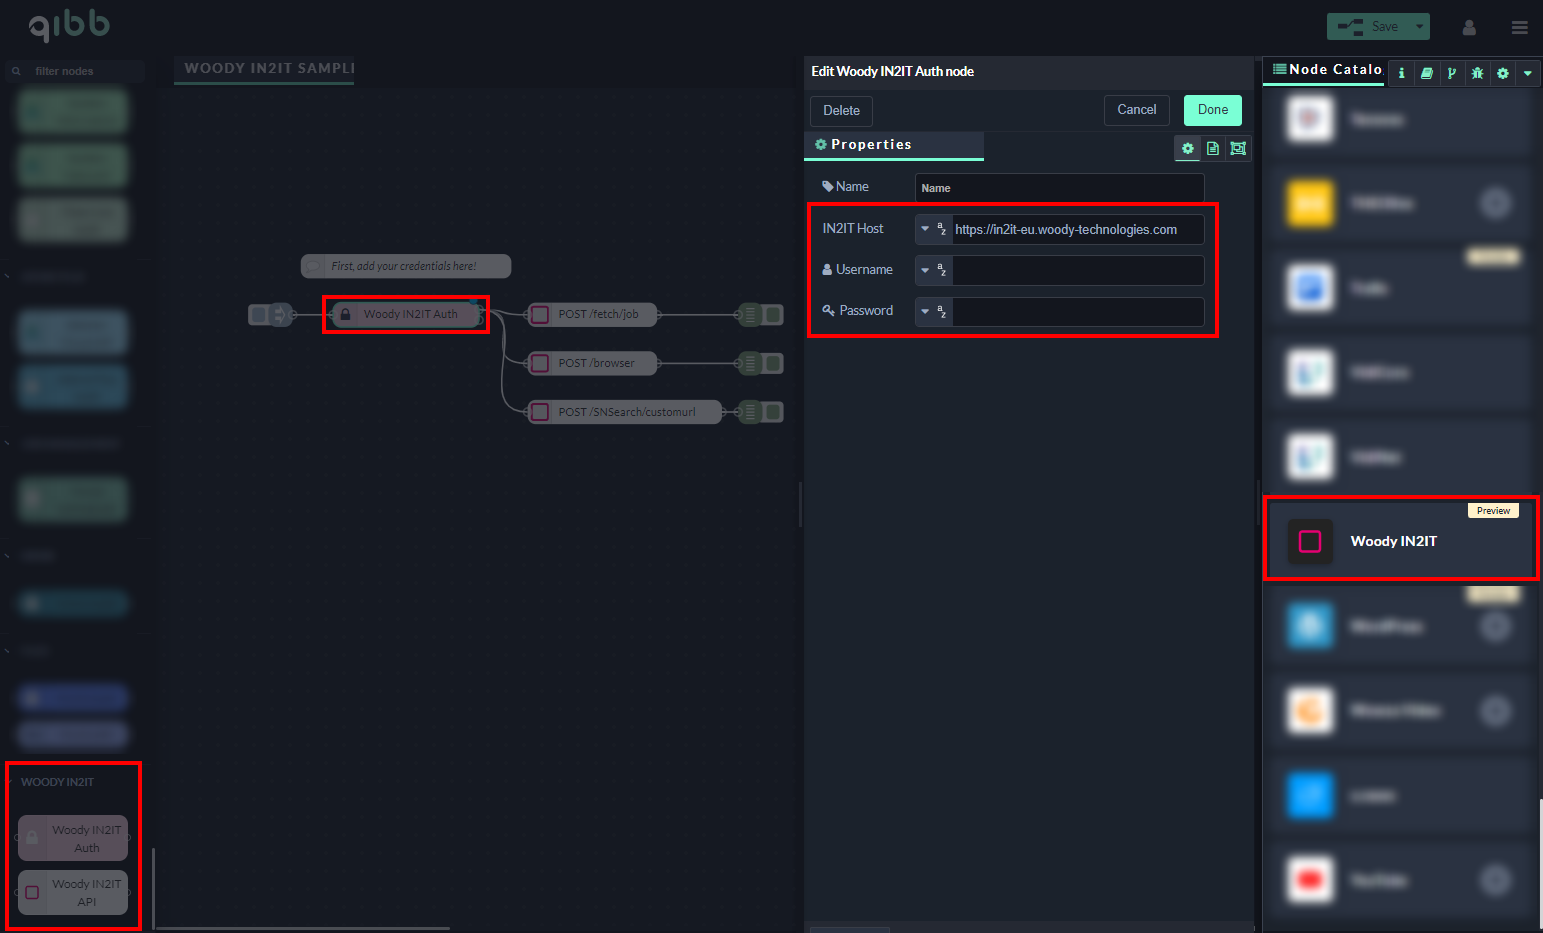
Ensure you have your Username, Password, and IN2IT Host for authentication.
-
Open the qibb Workflow Editor and navigate to the Node Catalog in the right sidebar.
-
Install the Woody IN2IT node by clicking on the + button.
-
Drag and drop the Woody IN2IT Auth and Woody IN2IT API nodes from the left sidebar into your flow and connect them.
-
Enter your Username, Password, and IN2IT Host into the Woody IN2IT Auth node and start using the integration.
The Woody IN2IT integration enables users to perform media processing tasks quickly and easily. By leveraging IN2IT's features, users can build complex workflows that integrate with other solutions seamlessly. If you encounter any issues when using IN2IT, please consult the documentation or reach out to our support team for assistance.
Importing flow examples of a node
Once you've successfully installed a node from the qibb catalog, you can easily import example flows that showcase how the nodes can be used. These example flows are directly accessible within the Flow Editor and are designed to guide users with helpful hints, including how to configure mandatory parameters and credentials.
Here's how to import examples:
-
In the top right corner of the Flow Editor, click on the menu icon.
-
Select Import to open the Import Dialog.
-
Click on the Examples tab.
-
Choose an example from the list.
-
Confirm your selection by clicking on the Import button.
By following these steps, you are now ready to make basic API calls using the provided examples. For further exploration of what’s possible, you can find more complex examples in the Flow Catalog.