Build your first flow in qibb
When you are logged in to qibb, you can see your deployed application in the Apps menu. First clicking on ‘Flow App’ and then on the ‘Open Flow Editor’ button on the top right corner, you will find yourself in the space where you can create, deploy, delete, import, and export flows.
qibb and Node-RED
qibb's Flow App is based on and compatible with Node-RED which is a flow-based development tool for visual programming developed originally by IBM for wiring together hardware devices, APIs, and online services.
Node-RED provides an editor to easily build a visual representation of the processes that form a program. This visual representation is a flow that consists of nodes that are linked together. Each node has a specific purpose. It takes an Input and runs a function or adds some data and exports the new values as an output.
Flow-based programming allows you to quickly set up a new application and helps to better understand what each component of your program is doing.
You can learn more about qibb Flows in Flows and Building Flows.
Your first qibb flow
Before you start building your first flow check our documentation about Flows and Using the qibb Node Catalog plugin.
This simple flow will access a store inventory and returns its status. The flow will contain common, generally available nodes like ‘inject’ and ‘debug’ and also one node from the special qibb palette namely the 'OpenAPI Client' node to get a data reading from a sample server (Swagger Petstore https://petstore.swagger.io/#/).
Let's build it up step by step. To create a new flow, click on the "+" button, on the top right corner of the designer canvas.
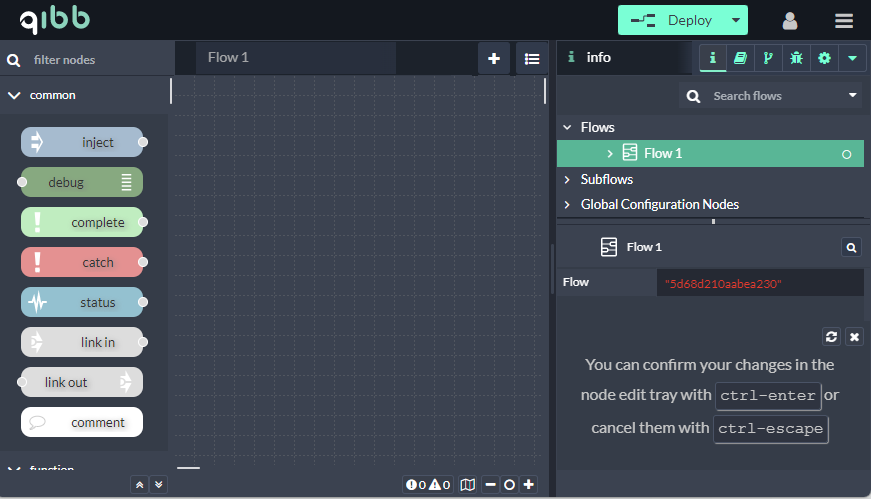
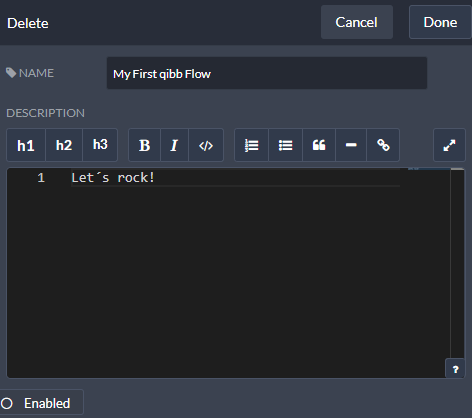
Create a new flow. You can add a name and description by double-clicking your new flow tab on the top.
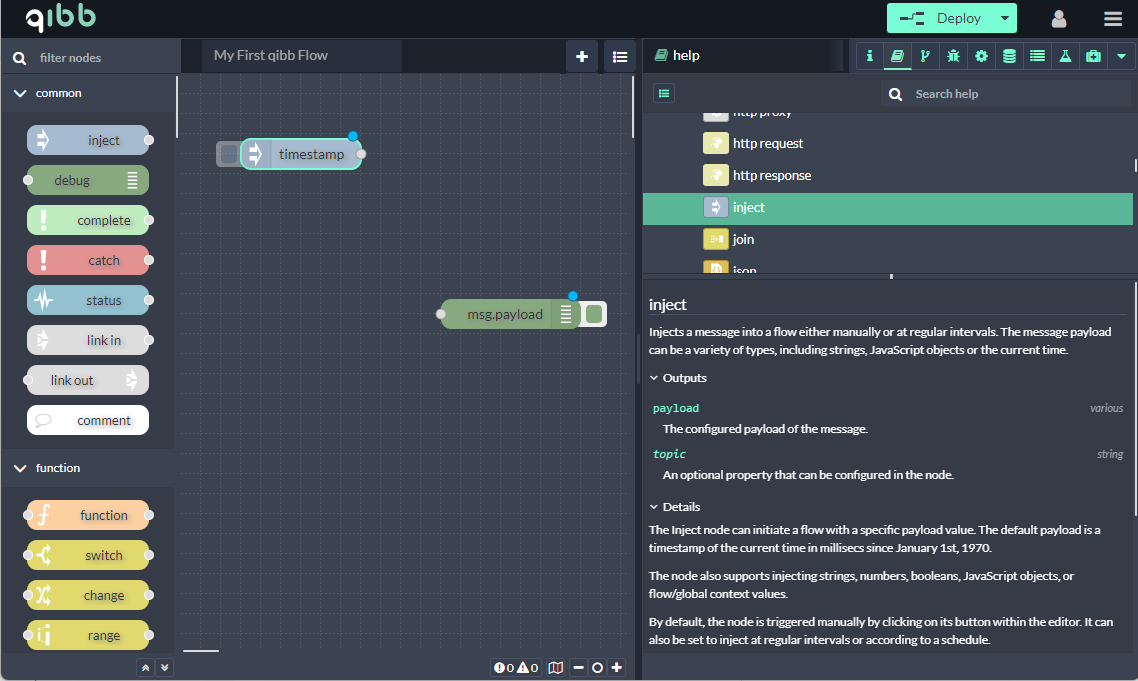
Drag and drop the two common nodes; ‘inject’ to trigger the flow manually and ‘debug’ to show received values.
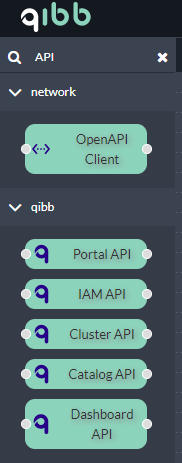
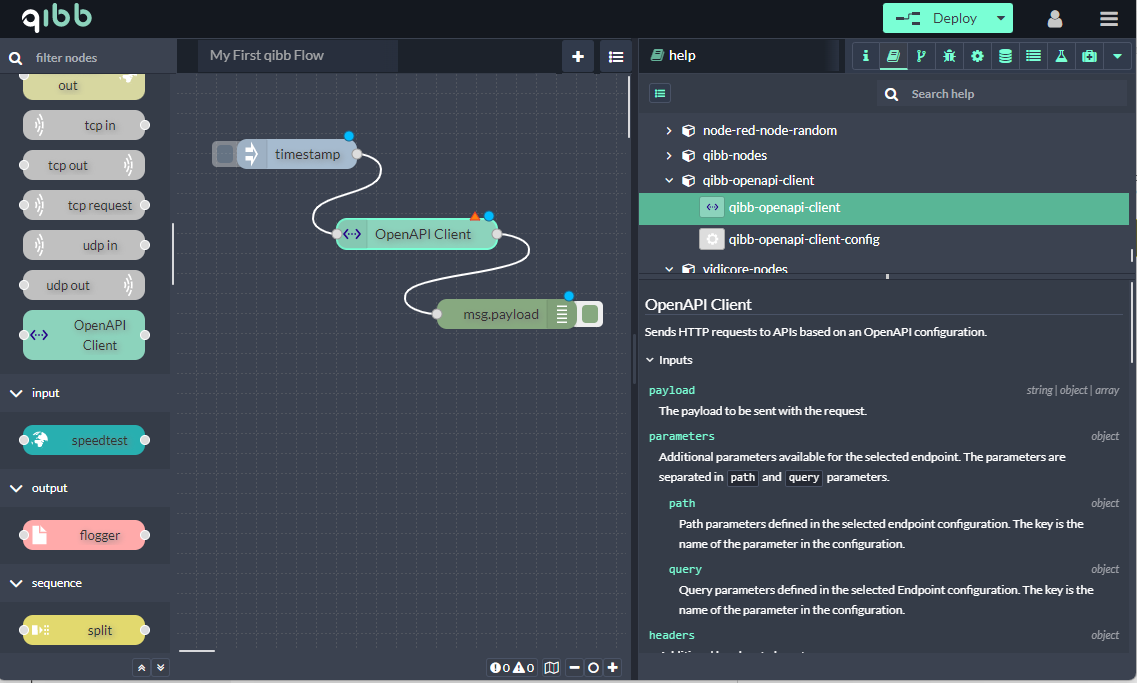
Now it is time to find one of the platform-specific nodes, our OpenAPI Client. Simply filter it in the top left corner (search tab)
Just drop the OpenAPI Client node between the ‘inject' (timestamp) and ‘debug’ (msg. payload) nodes. Node documentation is available under 'Help’ (book icon, top right corner)
To configure ‘OpenAPI Client’ please double-click on it.
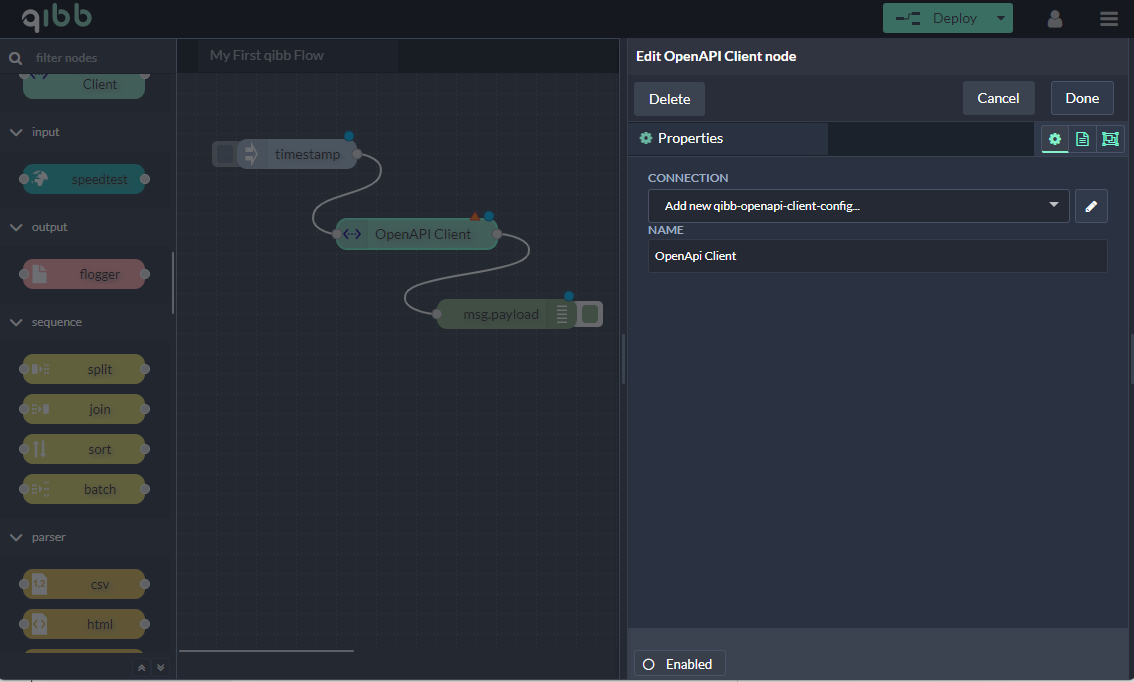
To configure the connection please click on the square pencil icon right to the field of connection and just paste the https://petstore.swagger.io/v2/swagger.json address into the URL field and push enter. Host, Name, and Preview will be automatically filled.
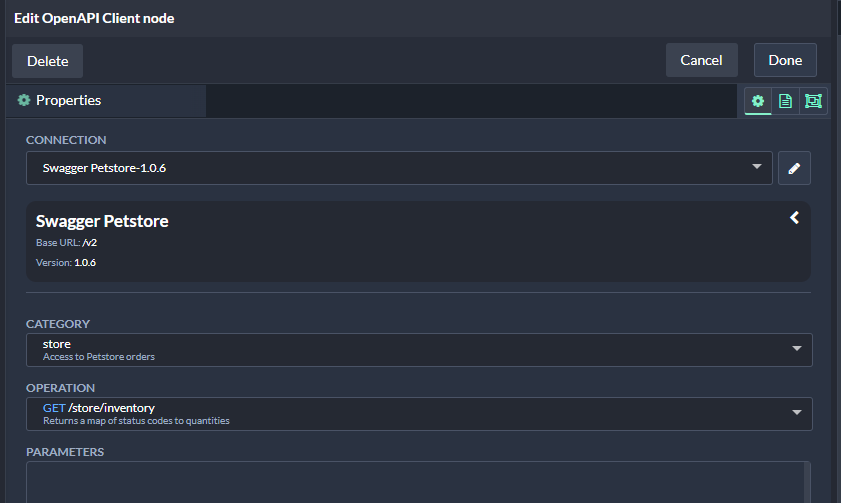
Click Add then Done. Now, you only need to click on the OpenAPI node and change Category to store and Operation to GET/store/inventory.
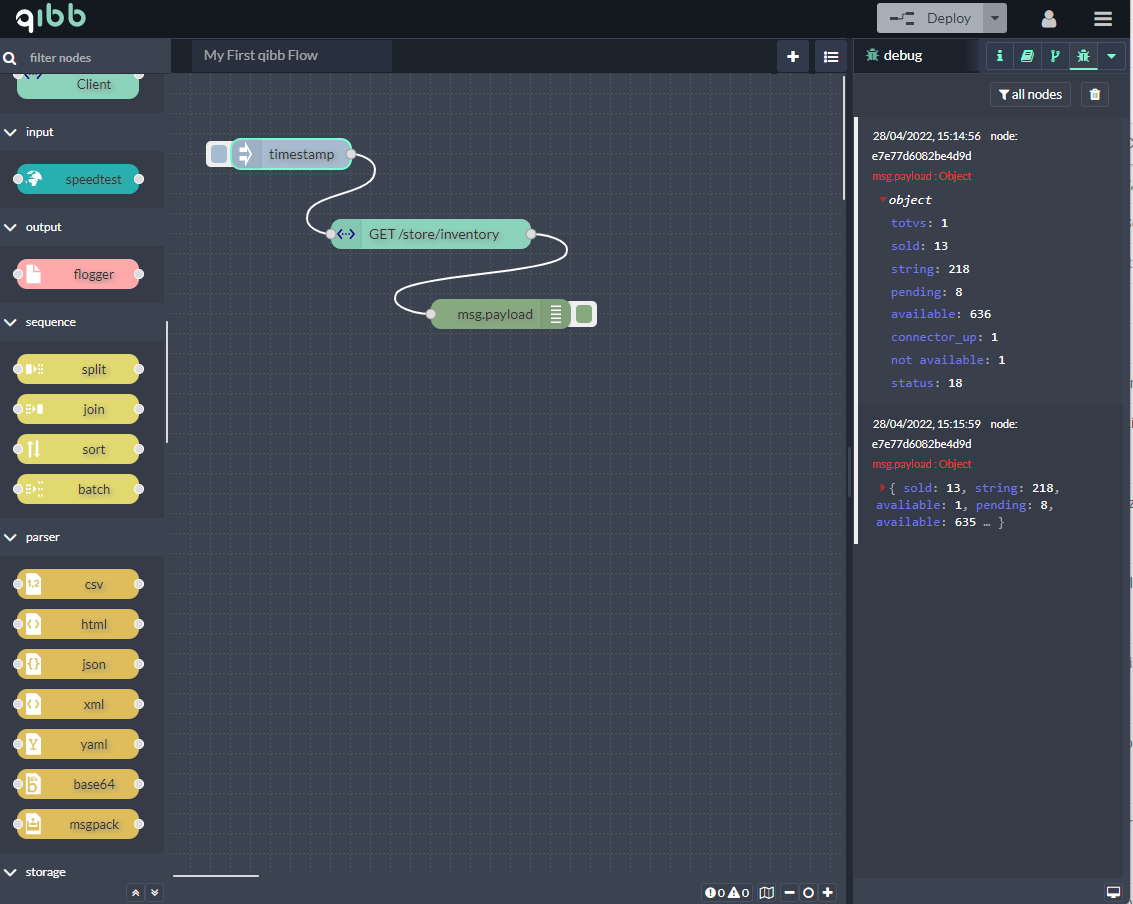
To apply the changes press the Done button and then the Deploy button in the top right corner. Click on the left side of the ‘timestamp’ node you can see the returning data under debug messages.
Congratulation and welcome to the world of qibb!