Introduction
Add a variety of Frame.io features to your application. Use the API to create custom workflow solutions and app integrations.
You can find more details and the supported operations on Frame.io | qibb Catalog.
How to get started with the Frame.io integration
Before you get started using the Frame.io integration please make sure that you have the required permissions and have set up a project in the Adobe Developer Console.
Community node required for authentication with Frame.io V4 API
Authentication with the Frame.io V4 API requires the community node: node-red-contrib-oauth2.
→ Learn about installing and using community nodes here: Installing nodes from the Node-Red Community
→ The authentication setup for this particular community node is outlined in details below.
Flow example for authentication setup
The flow examples in this node package provide a complete authentication setup recommended for initial configuration.
→ Learn how to import flow examples here: Importing flow examples of a node
Set up a project in the Adobe Developer Console
-
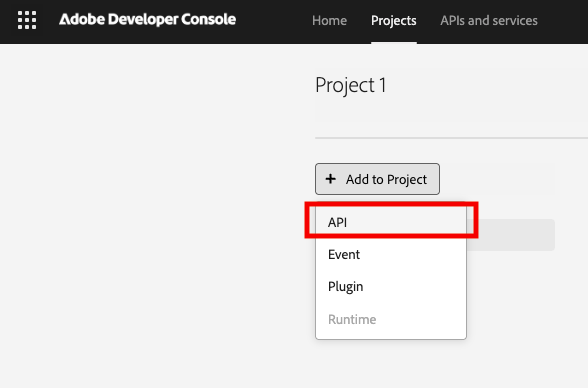
In the Adobe Developer Console, navigate to Projects.
-
In a new or existing project, click “Add to Project” and select “API” from the dropdown.
-
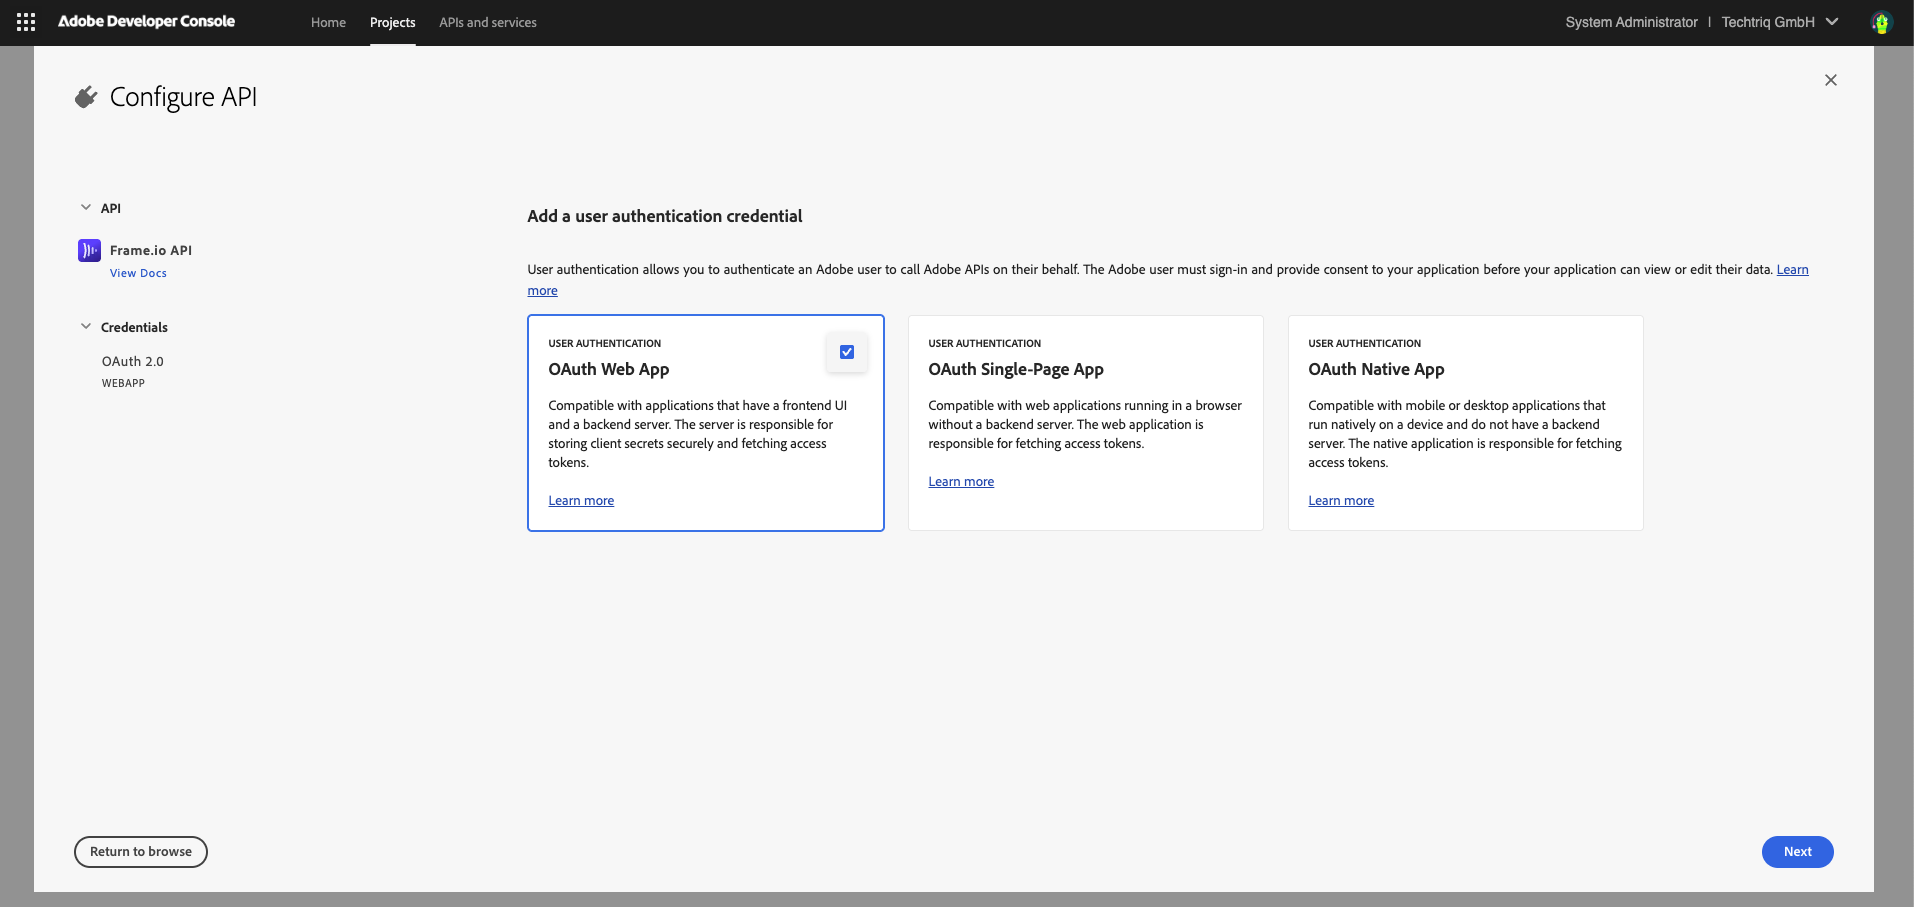
Select the Frame.io API and click next.

-
Configure the API to authenticate via OAuth Web App.
-
Configure the redirect URI and redirect URI pattern to target the Flow App where your project is housed. Note: you will only be able to fetch a token in the Flow App used for the Redirect URI. This is completed in “Configure an OAuth2 flow” section below.
Redirect URI should use format:
https://flow-{appId}.{cluster}.qibb.com/oauth2/redirect
Redirect URI pattern:
https://flow-{appId}\\\\.{cluster}\\\\.qibb\\\\.com/*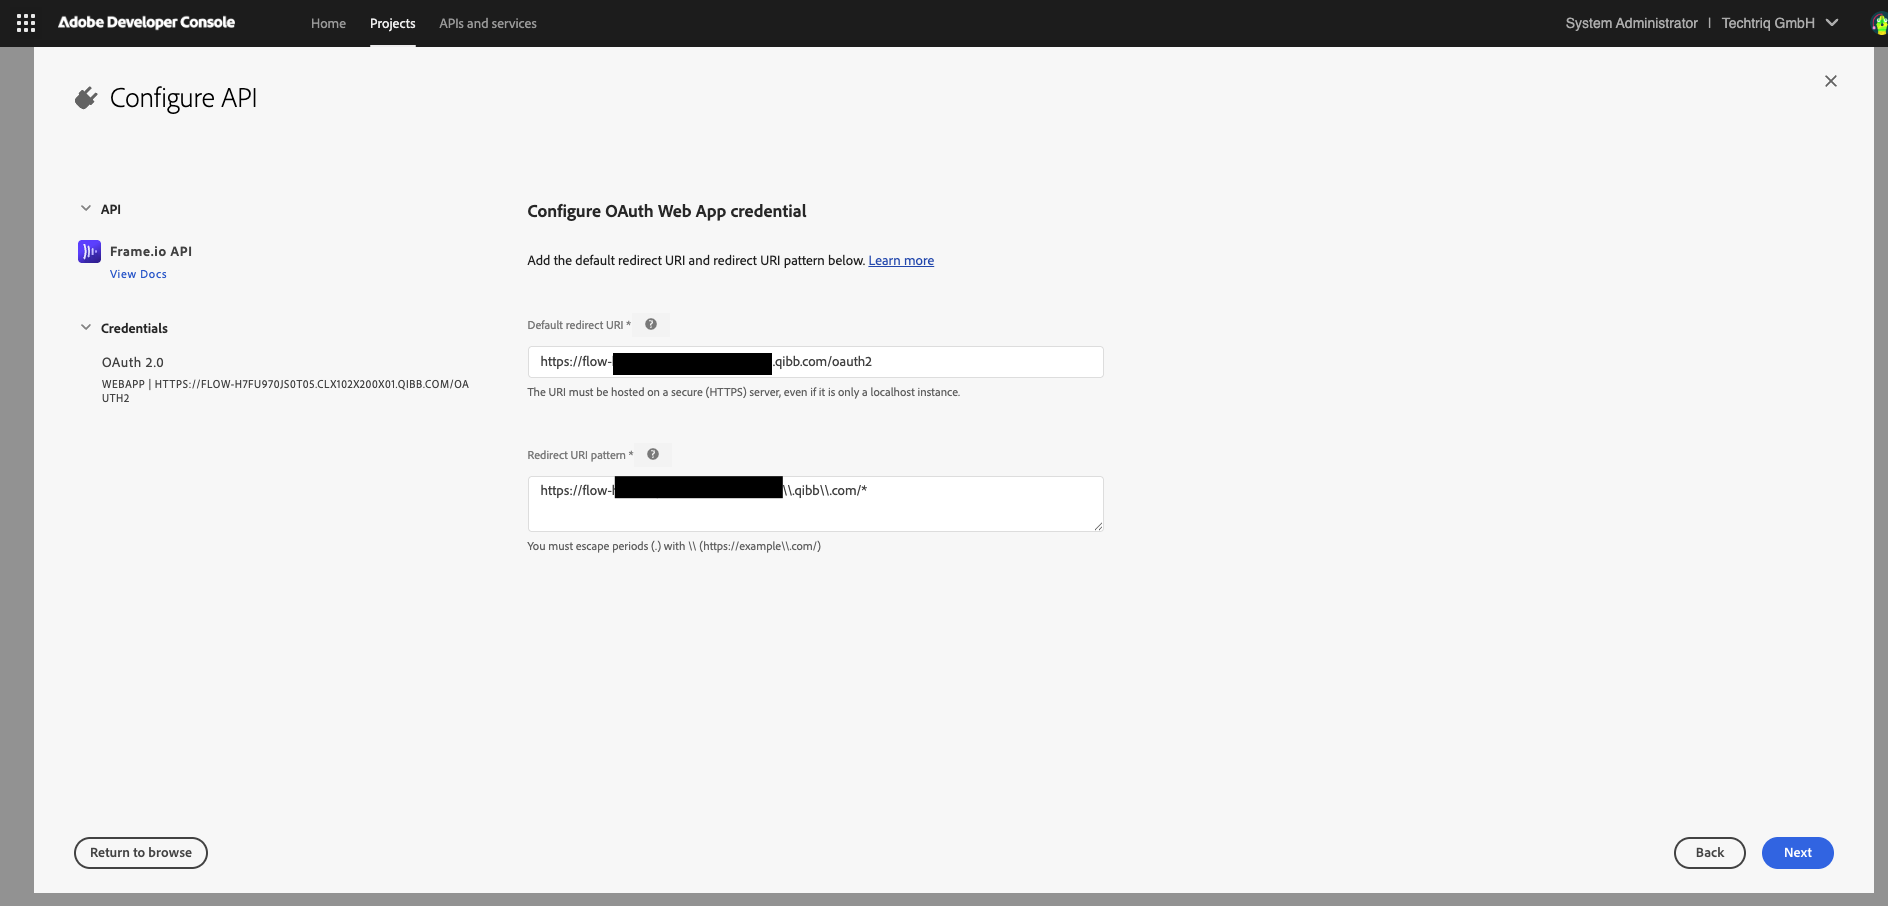
-
-
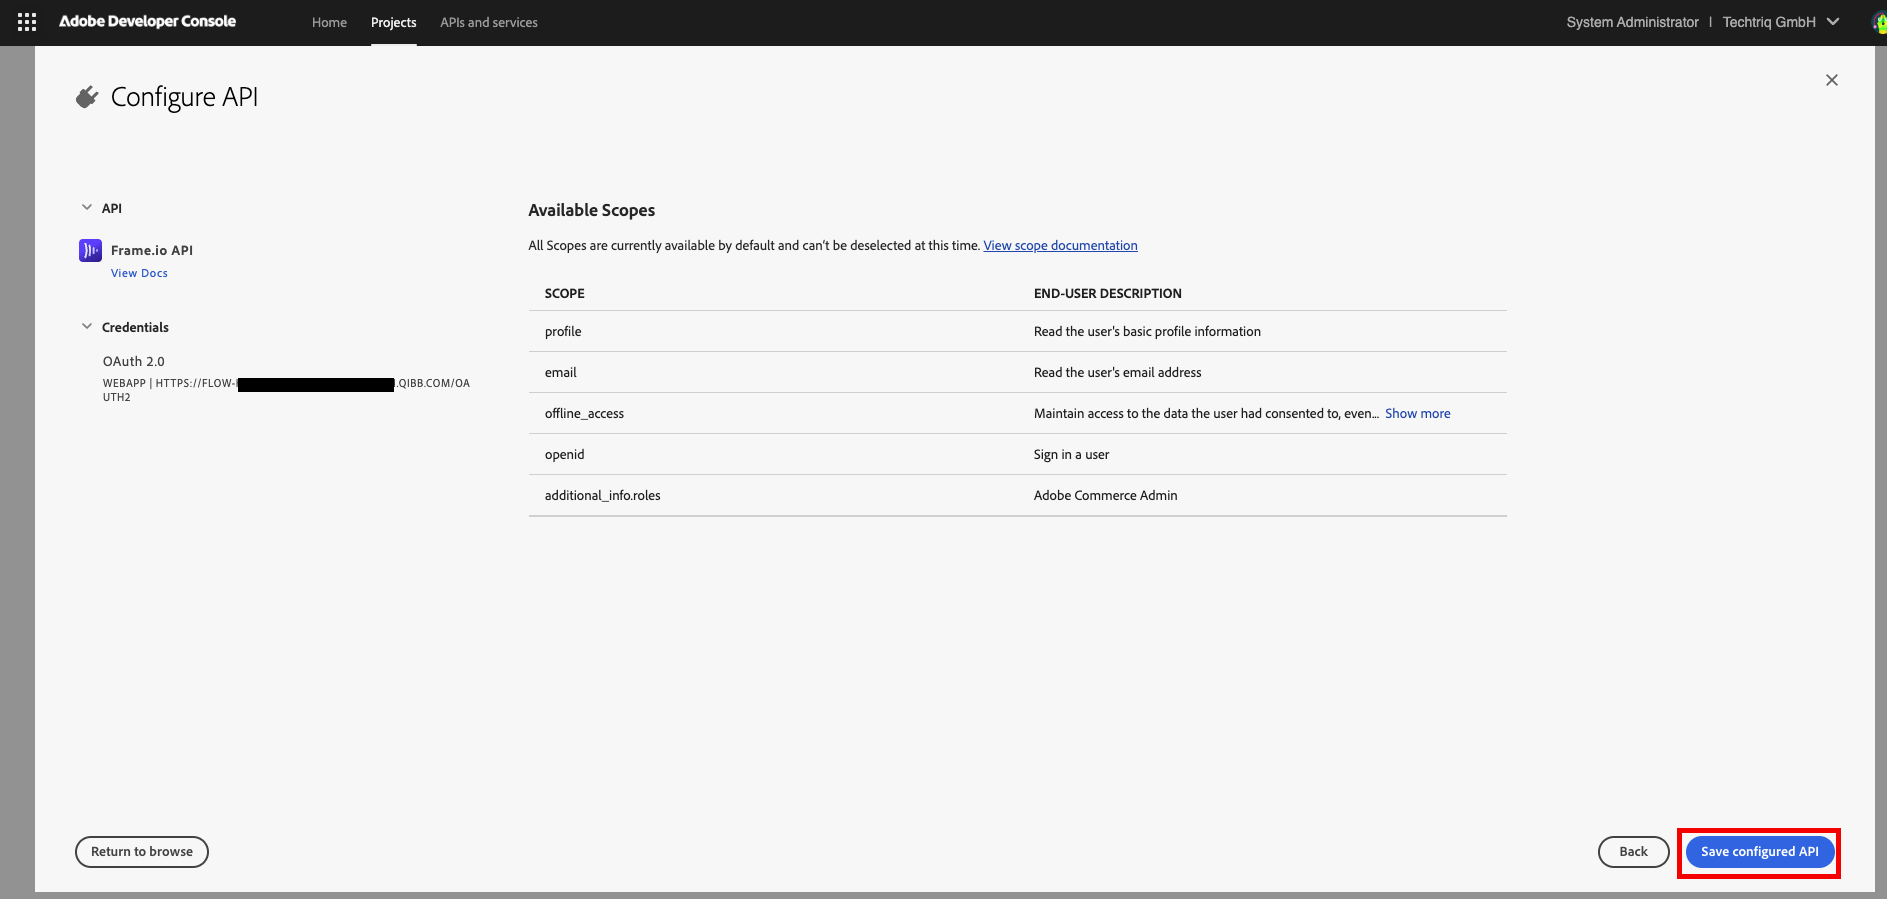
Configure scopes: currently only the defaults can be used. Save your configured API.
-
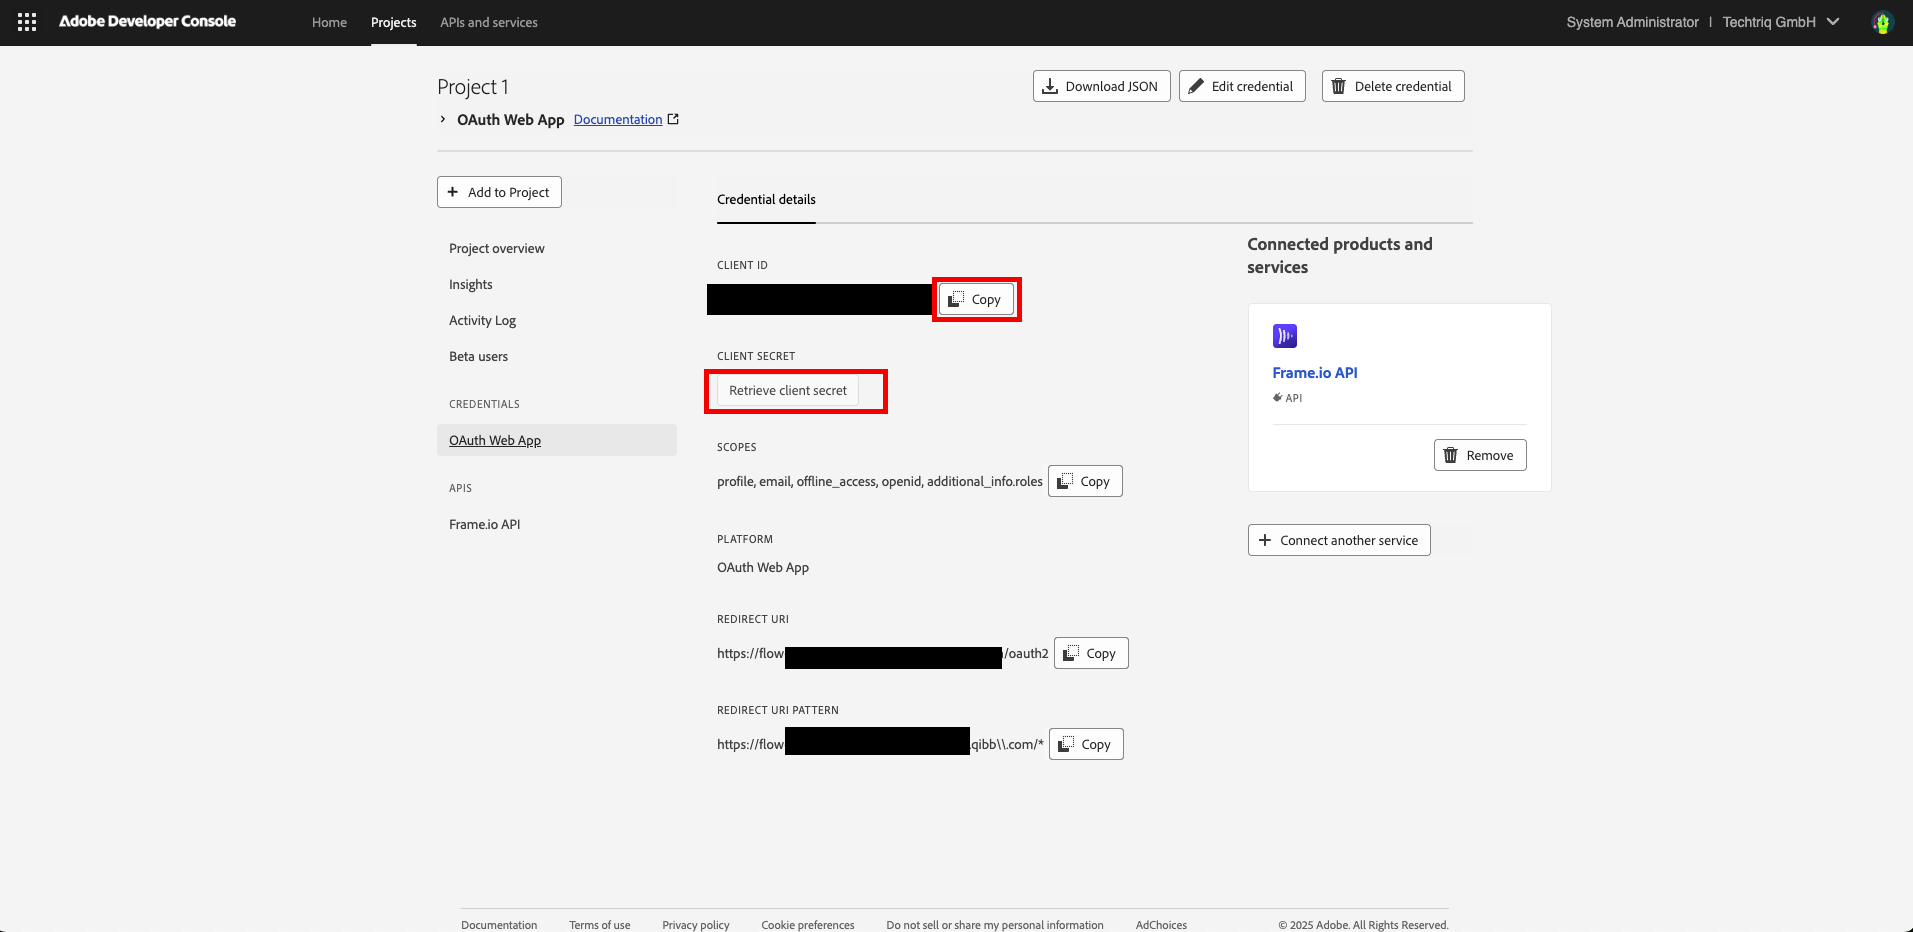
Retrieve your client_id and client_secret for use in the Flow App. You will be able to access your credentials from the same dashboard later; the client secret has to be retrieved before it can be copied.
Configure an OAuth2 flow
-
Go to your qibb Workflow Editor.
-
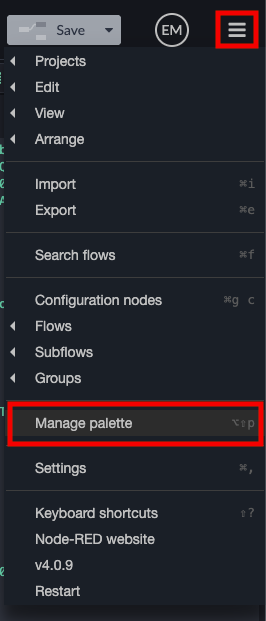
Open the Nodes Palette and install the node-red-contrib-oauth2 node from the community catalog to configure the authentication logic.

-
Import this flow, which includes logic for authentication and for fetching a refresh token: oauth2adobe.json
-
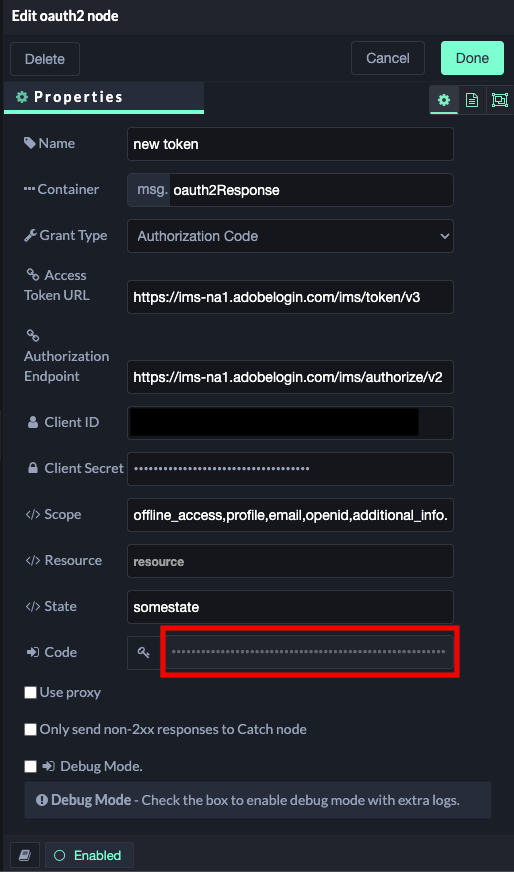
Configure the oauth2 node with your client_id, client_secret and the following scopes:
offline_access,profile,email,openid,additional_info.roles,AdobeID.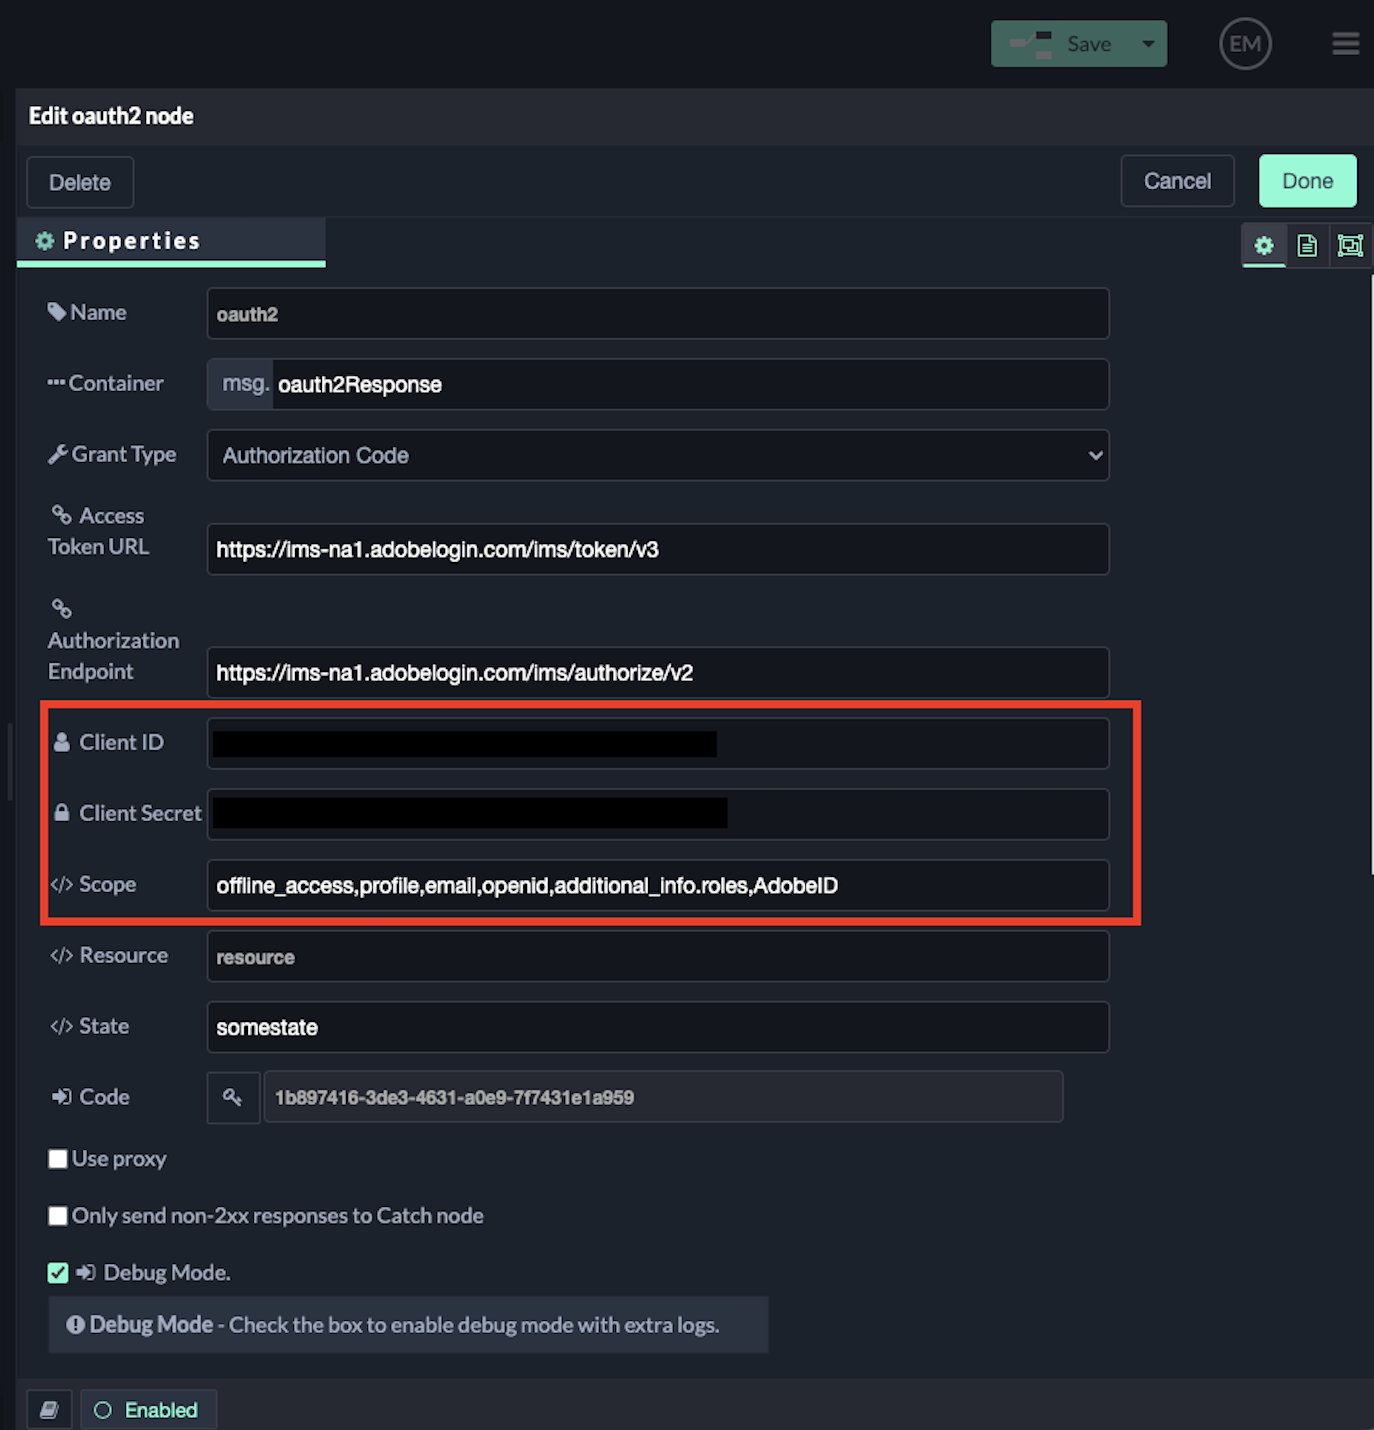
Note that the AdobeID scope is required, despite being absent from the scopes listed in the Adobe Developer Console for the configured Web App.
-
Click ‘Done’ and ‘Save’ your Flow App.
-
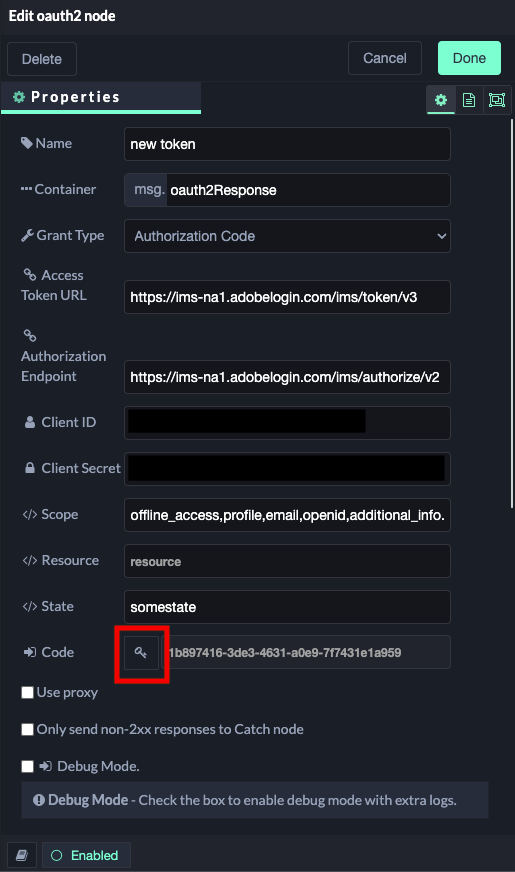
Re-open the oauth2 node and click the key button. This will open a new browser tab to complete the oauth2 flow.
-
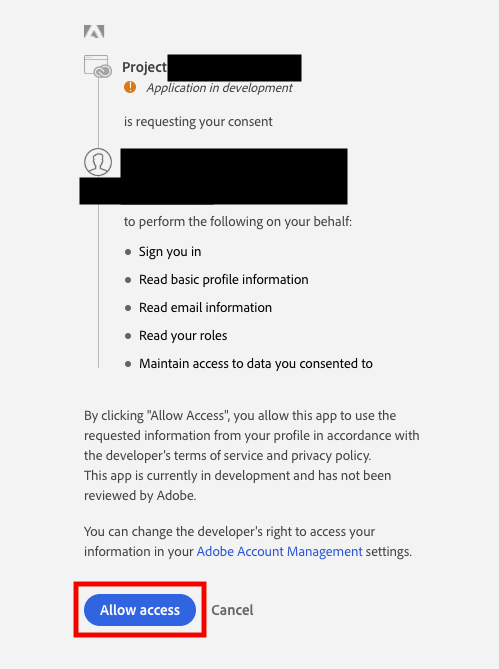
In this new tab, you must log in to your Adobe account. The first time you complete this step, you will be required to allow access as well.
-
The tab will close on its own and when you are returned to your flow app, you will see that the read only ‘code’ field is populated.
-
Trigger the flow to save your token to the flow context, or edit the configurations to suit your use case.
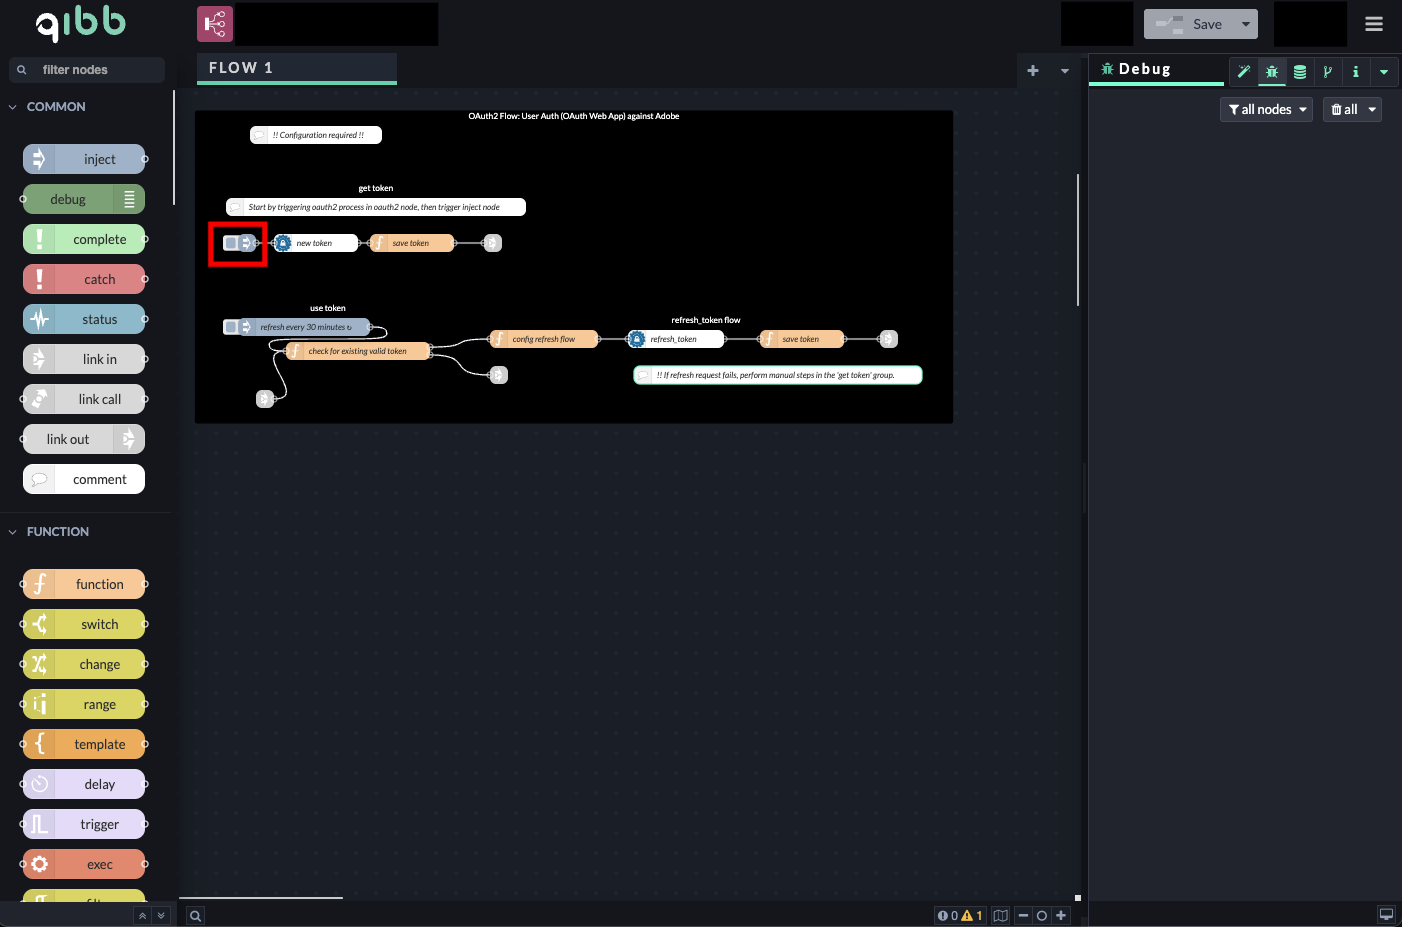
The ‘use token’ and ‘refresh_token flow’ groups in the OAuth2 flow have been configured to refresh your token for uninterrupted use for the duration that the refresh token is valid. Because the refresh token expires after two weeks, the user must complete the manual steps in the ‘use token’ flow biweekly.
Until the code has been successfully added to the oauth2 node, triggering the flow will fail.
Add Frame.io nodes
-
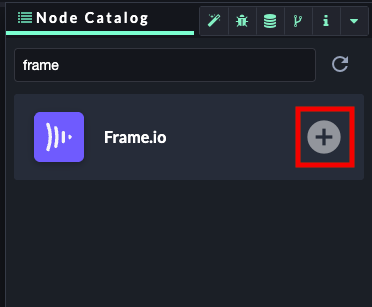
Open the Node Catalog in the right sidebar and install the Frame.io node.
-
Drag Frame.io API nodes to the grid and configure them as needed in your flow.
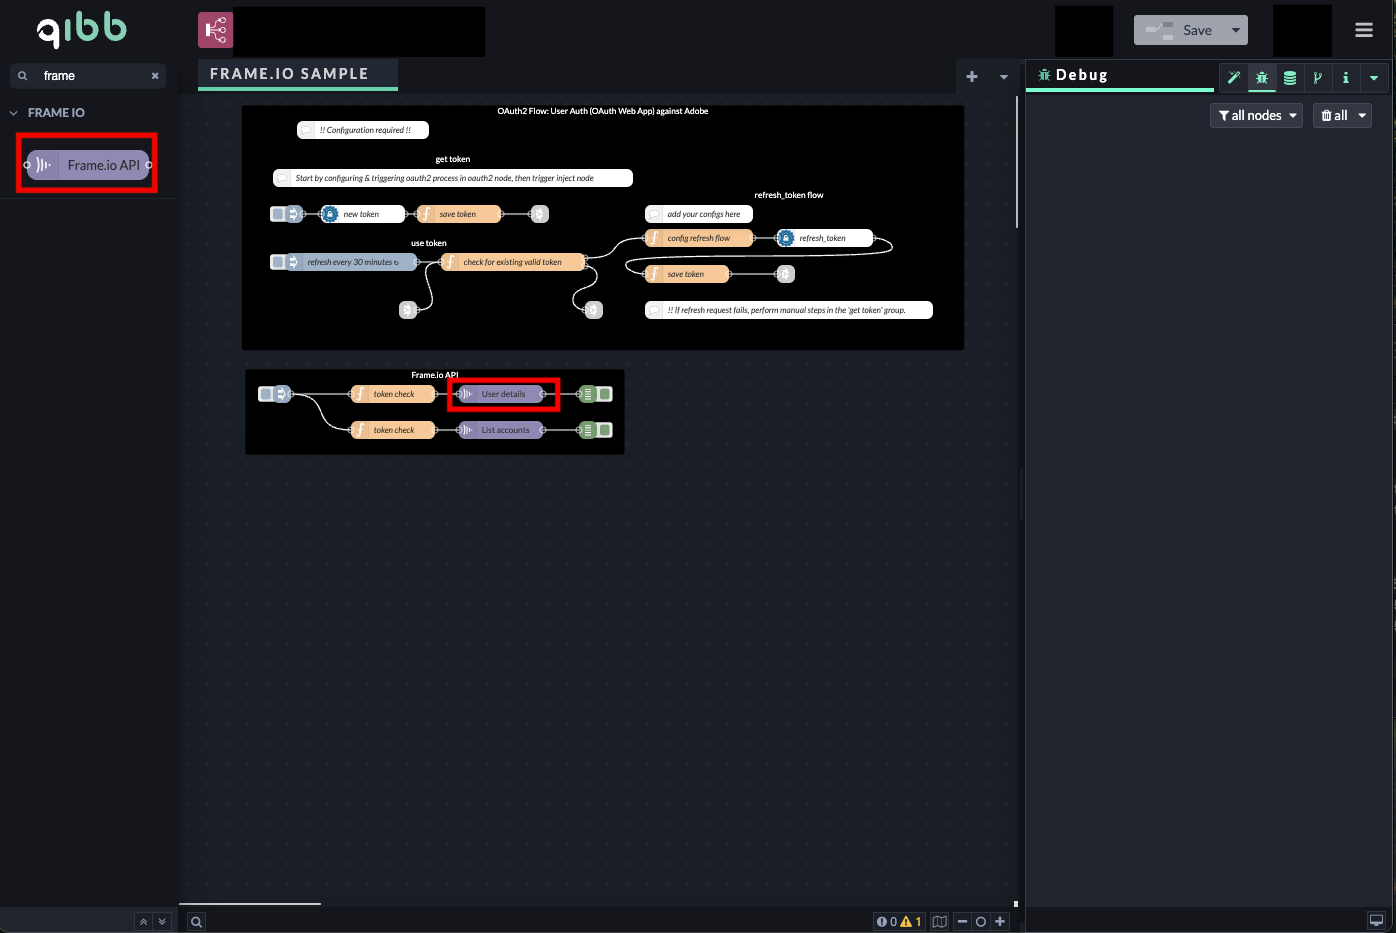
-
You must set a node to send the token, stored in your flow context, as an Authorization header upstream of your first node. This header must be passed to every downstream node. Here is an example configuration for a function node, as seen in the image above.
JavaScriptconst frameIo = flow.get("frameIo") || {}; const accessToken = frameIo.accessToken || null; msg.frameio = { input: { headers: { "Authorization": `Bearer ${accessToken}` } } }; return msg;
Importing flow examples of a node
Once you've successfully installed a node from the qibb catalog, you can easily import example flows that showcase how the nodes can be used. These example flows are directly accessible within the Flow Editor and are designed to guide users with helpful hints, including how to configure mandatory parameters and credentials.
Here's how to import examples:
-
In the top right corner of the Flow Editor, click on the menu icon.
-
Select Import to open the Import Dialog.
-
Click on the Examples tab.
-
Choose an example from the list.
-
Confirm your selection by clicking on the Import button.
By following these steps, you are now ready to make basic API calls using the provided examples. For further exploration of what’s possible, you can find more complex examples in the Flow Catalog.