

The grid preferences allow to tweak the look and feel of a dashboard. There are several options to configure the grid system.
Changing the grid preferences
To change the grid preferences of a dashboard, perform the following steps:
-
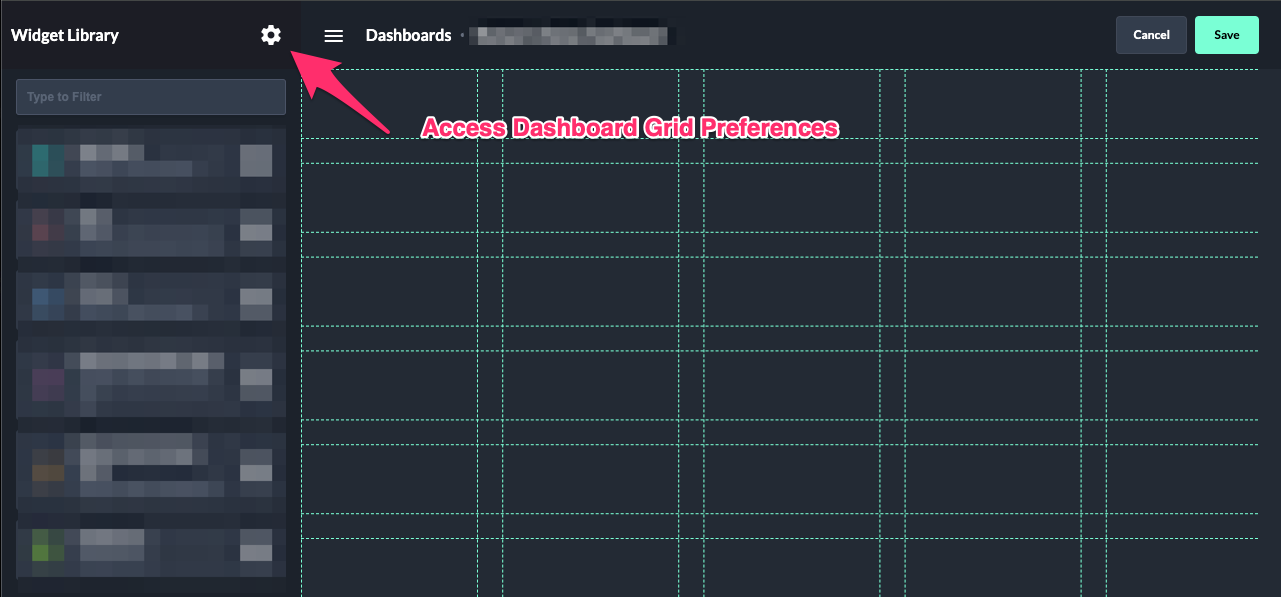
While viewing a dashboard, click on the Config button in the top right corner to unveil the grid and widget library.
-
In the left sidebar, you will see the Widget Library. Click on the Cog Icon Button at the top of the sidebar.
-
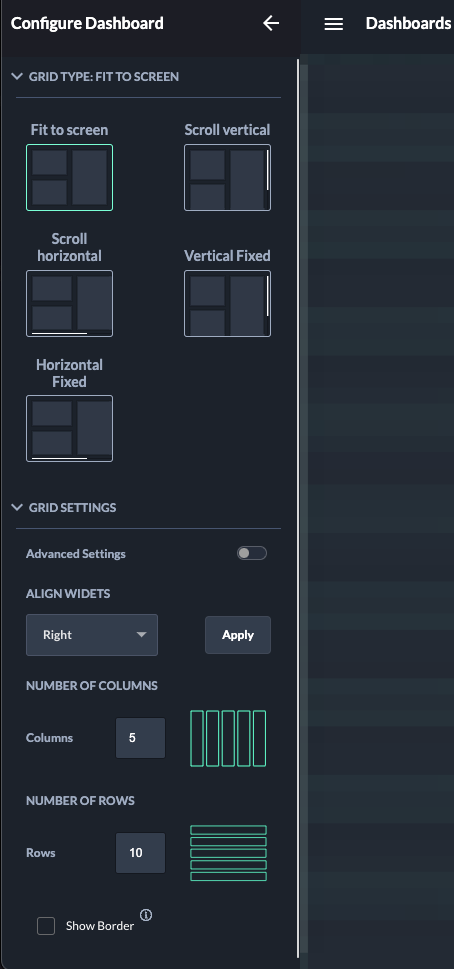
Tweak your grid by applying changes in the Grid preferences section.
-
Publish your changes made to the dashboard by clicking on Save in the top right corner.
|
Access Grid Preferences |
Grid Preferences |
|---|---|
|
|
Overview of options
|
|
Description |
|---|---|
|
Grid Type |
Changes the general layout and scroll behavior of the grid.
|
|
Align Widgets |
Aligns all widgets, depending on the selected position:
|
|
Max number of columns |
Changes the maximum amount of columns.
|
|
Max number of rows |
Changes the maximum amount of rows.
|
|
Min number of columns |
Changes the minimum amount of columns. |
|
Min number of rows |
Changes the minimum amount of rows. |
|
Fixed row height |
Changes the fixed height of rows
|
|
Fixed column width |
Changes the fixed width of columns
|
|
Show Border |
Controls the surrounding space between the grid and the page. Disable this option if the grid should fully stretch to the edges of the page. |
|
Advanced Mode |
Shows or hides the maximum and minimum settings for rows and columns.
|